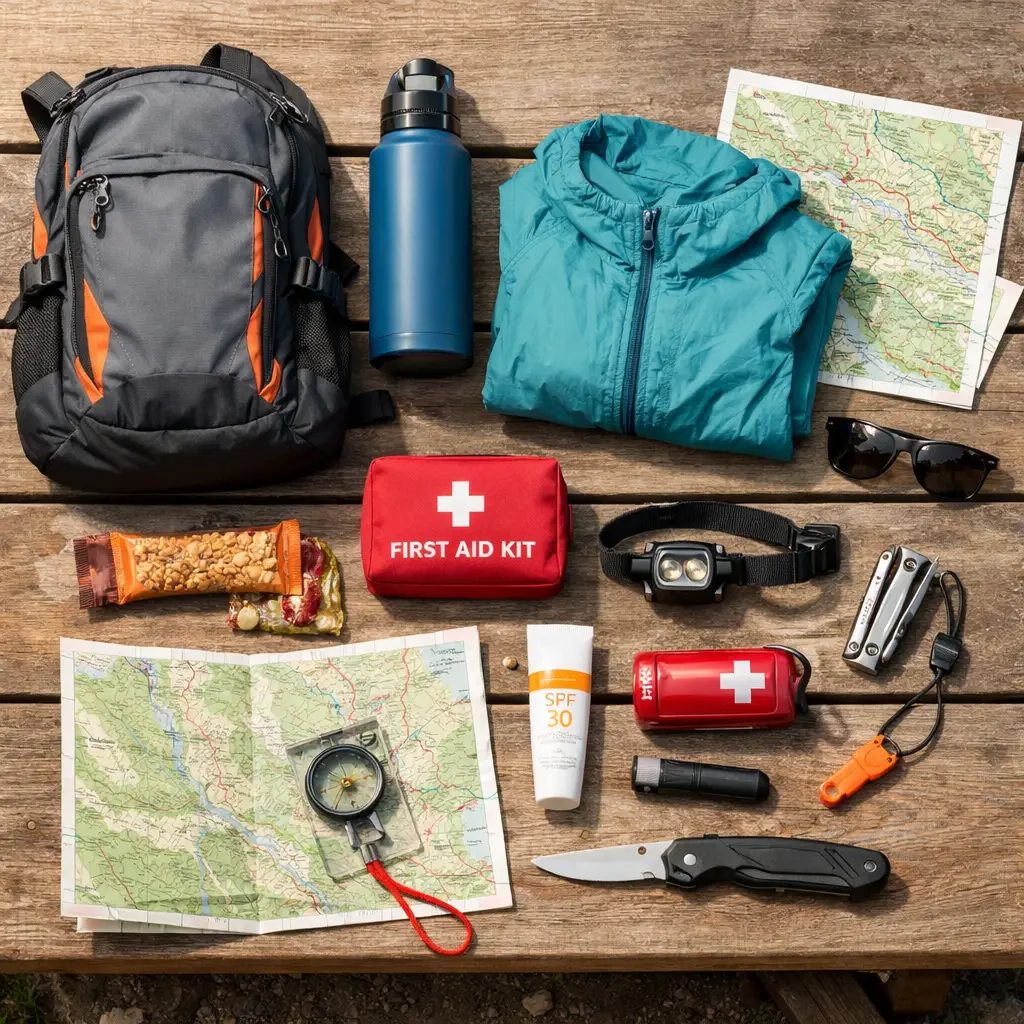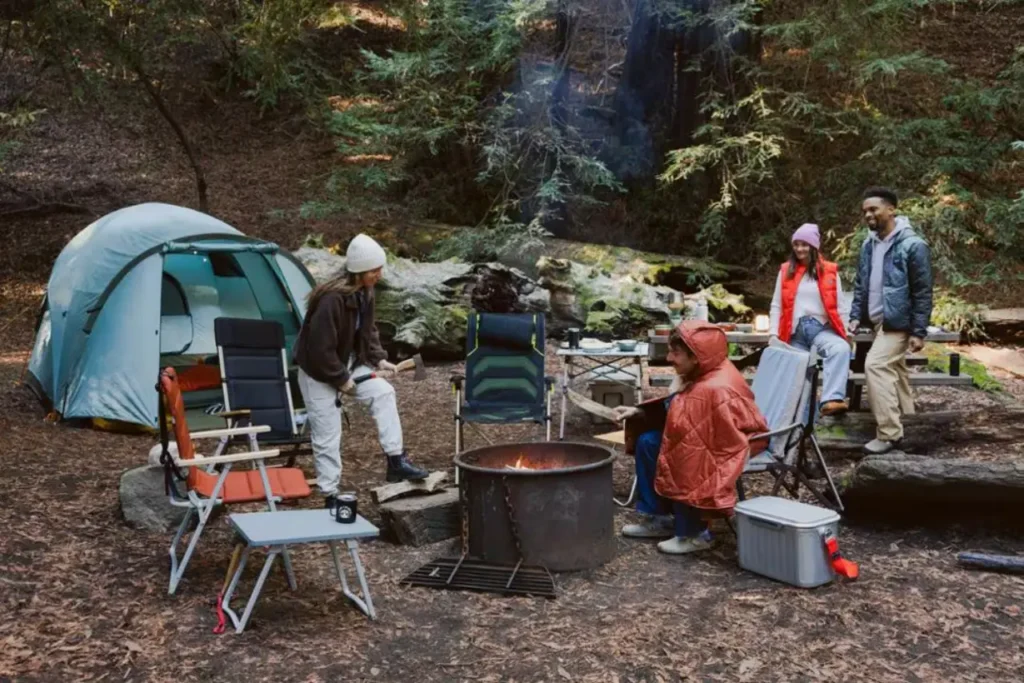
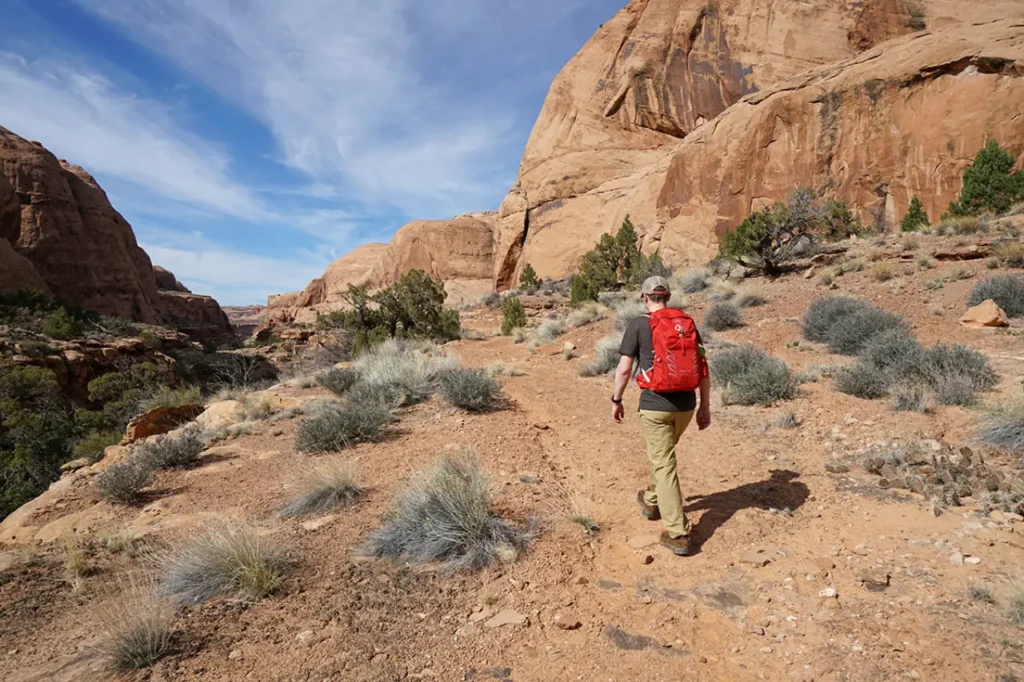
Packing for a weekend hike is an exercise in balance.
Bring too little, and a cold evening, sudden rainstorm, or delayed return can become a real problem. Bring too much, and every unnecessary item becomes more noticeable as the trail climbs.
The goal is not to squeeze every piece of outdoor gear you own into a backpack. It is to carry what you need to stay safe, comfortable, hydrated, and prepared for the conditions ahead.
This weekend hiking packing list covers the essentials for a day hike and the additional gear needed for a simple one-night backpacking trip. It also explains where you can save weight, which comfort items may be worth carrying, and how to choose gear that fits the way you actually hike.
A short forest trail near town requires a different setup than an exposed mountain route with limited water and a cold campsite. Use this list as a starting point, then adjust it for the weather, terrain, distance, and your own comfort needs. 🥾
Quick Look: The Essential Weekend Hiking Checklist
Use this table as a fast reference while packing. The sections below explain how to choose each item and when you may need something different.
| Category | Day Hike Essentials | Add for Overnight |
|---|---|---|
| The 10 Essentials | Navigation, headlamp, sun protection, first aid, knife or repair tool, fire starter, emergency shelter, extra food, extra water, extra clothes | Carry all ten |
| Backpack | 20–35 liters | 40–55 liters |
| Clothing & Footwear | Hiking shoes or boots, hiking socks, base layer, mid layer, rain jacket, hat | Insulated jacket, sleep clothes, extra socks |
| Shelter & Sleep | Emergency shelter | Tent or tarp, sleeping bag or quilt, sleeping pad |
| Kitchen & Food | Water, snacks, lunch | Water treatment, stove, fuel, pot, utensil, dinner, breakfast |
| Health & Hygiene | Hand sanitizer, tissues, personal medications | Toothbrush, toothpaste, trowel, toilet paper, waste bags |
| Optional Gear | Trekking poles, camera, power bank | Camp pillow, lightweight chair, book |
The Complete Weekend Hiking Packing List: A Detailed Breakdown
A useful packing list should help you prepare without convincing you that every hike requires a mountain of specialized equipment.
Before putting anything in your backpack, check:
- The weather forecast
- Expected nighttime temperature
- Total distance
- Elevation gain
- Trail difficulty
- Water availability
- Sun, wind, and rain exposure
- Campsite regulations
- Food-storage requirements
- Distance from roads or emergency help
These details matter more than whether the trip lasts eight hours or one night.
A short overnight route may require substantial insulation when the campsite is exposed and temperatures drop after sunset. A long day hike through hot, dry terrain may require more water than an overnight route beside dependable streams.
As you pack, ask whether each item supports safety, navigation, warmth, hydration, nutrition, weather protection, or meaningful comfort. If it does not clearly serve one of those purposes, consider leaving it behind. 🎒
Part 1: The Ten Essentials
The Ten Essentials are the items that help you manage unexpected problems on the trail.
You may return home without using most of them. That does not mean they were unnecessary. Their purpose is to help when a straightforward hike changes because of an injury, navigation error, weather shift, equipment failure, or slower-than-expected pace.
1. Navigation
Carry a reliable way to follow your route and recognize when you have moved off course.
For a well-marked day hike, that may include:
- A downloaded offline map
- A fully charged phone
- A printed trail map
- A compass
- A power bank
Download the map before leaving home. Cell service often disappears in valleys, forests, and mountainous areas, even when the trailhead is close to town.
A phone is extremely useful for checking location and progress, but it should not be your only plan on remote routes. Protect it from rain, limit unnecessary battery use, and carry a compact power bank when the hike is long enough that battery life could become an issue.
2. Headlamp
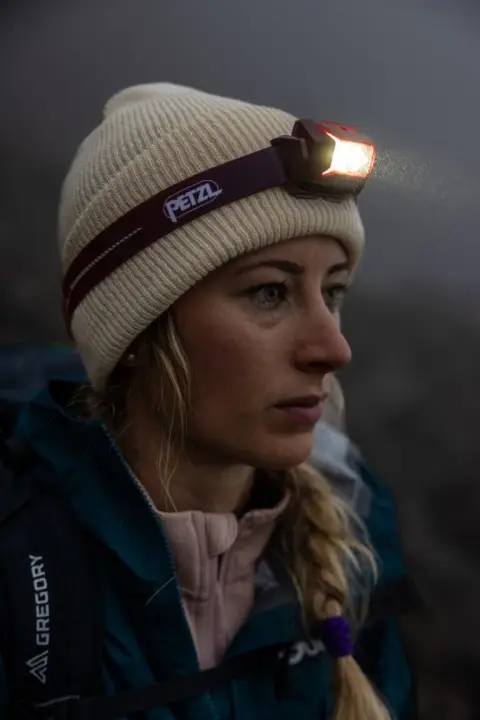
Carry a headlamp even when you expect to finish well before sunset.
A wrong turn, blister, long lunch break, or slower group member can add more time than expected. Hiking with a headlamp is safer and easier than holding a phone flashlight while trying to follow an uneven trail.
For simple weekend trips, look for a light with an easy-to-use control, enough brightness for trail navigation, and either replaceable or rechargeable batteries. The Petzl Tikka is a straightforward example for hikers who want a compact light without complicated settings. Hikers who prefer a rechargeable model that can also accept AAA batteries may find the Petzl Actik Core more versatile.
Check the battery before every trip and make sure the headlamp cannot accidentally switch on inside your pack.
3. Sun Protection
Bring protection for your skin and eyes, even when the day begins cool or cloudy.
A basic sun-protection kit includes:
- Sunscreen
- SPF lip balm
- Sunglasses
- A sun hat
- Sun-protective clothing when needed
Exposure can be intense on open ridgelines, snowfields, desert trails, beaches, and high-elevation routes.
Keep sunscreen somewhere accessible so you can reapply it without emptying the backpack.
4. First-Aid Kit
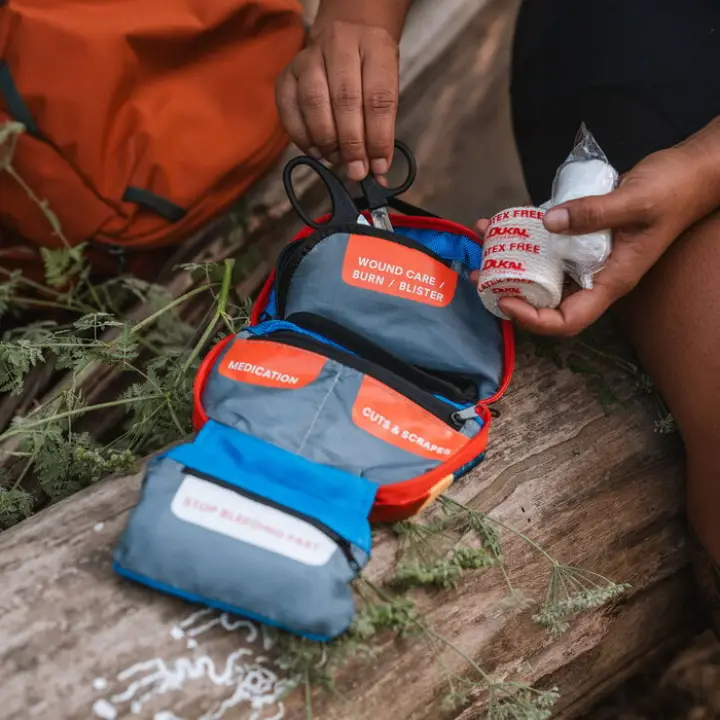
A hiking first-aid kit should address the minor problems most likely to interrupt the trip.
Useful supplies include:
- Adhesive bandages
- Gauze
- Medical tape
- Antiseptic wipes
- Blister treatment
- Tweezers
- Pain relief
- Disposable gloves
- Personal medications
You can build a kit yourself or start with a compact premade option. The Adventure Medical Kits Mountain Series Hiker Medical Kit includes trail-focused supplies in a water-resistant bag, while the smaller Ultralight/Watertight .5 Medical Kit is sized for two people on short one- or two-day trips.
A premade kit is only a starting point. Add personal medications and remove anything you do not understand or are unlikely to use.
Pay particular attention to blister care. Treating a hot spot early is much easier than trying to hike several miles after it becomes an open blister.
5. Knife or Multi-Tool
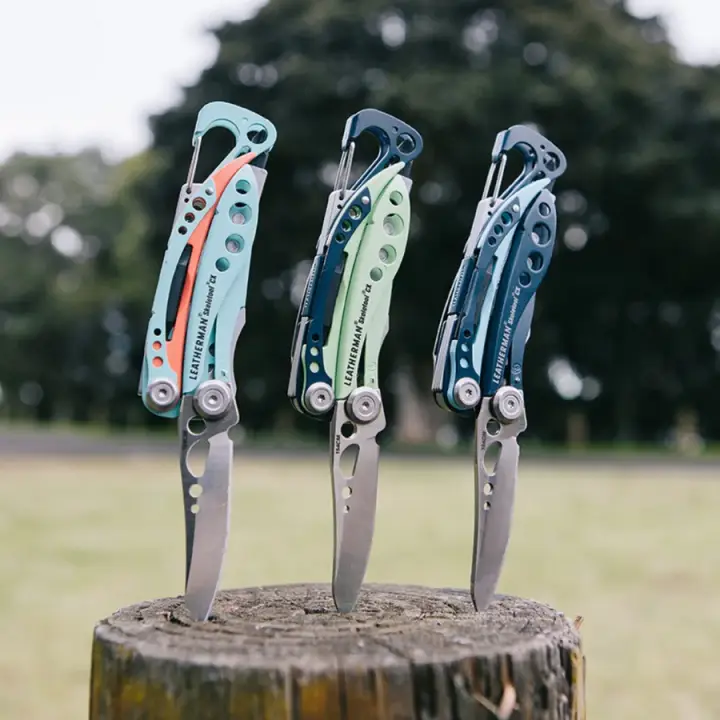
A small knife or compact multi-tool can help with food packaging, cord, splinters, and minor equipment repairs.
Most weekend hikes do not require a large survival knife or a heavy tool with two dozen functions.
A compact option such as the Leatherman Skeletool provides a blade, pliers, wire cutters, driver bits, and a bottle opener without the bulk of a full-size workshop-style tool.
Choose the smallest tool that covers the tasks you are realistically likely to perform.
6. Fire Starter
Carry a lighter, waterproof matches, or another dependable ignition source.
This can help start a backpacking stove or provide emergency warmth where fires are legal and safe.
It does not mean you should build a campfire on every trip. Fire restrictions, dry vegetation, high winds, and fragile environments may prohibit open flames.
Check current local regulations before leaving and follow them carefully.
7. Emergency Shelter
An emergency shelter is not the same as the tent carried for a planned overnight stay.
For a day hike, bring something compact that can reduce heat loss and provide protection from wind or precipitation if you are forced to stop.
Practical options include:
- An emergency bivy
- A reflective emergency blanket
- A lightweight emergency tarp
This becomes especially important on mountain trails, remote routes, and hikes where temperatures fall quickly after sunset.
8. Extra Food
Pack more food than your planned itinerary requires.
For a day hike, this might mean an additional energy bar, nut-butter packet, trail mix, jerky, or dried fruit.
For an overnight trip, carry at least some extra food that does not require a stove. That way, a fuel problem or broken stove does not leave you without something to eat.
Choose foods that are calorie-dense, familiar, and easy to eat when you are tired.
9. Extra Water
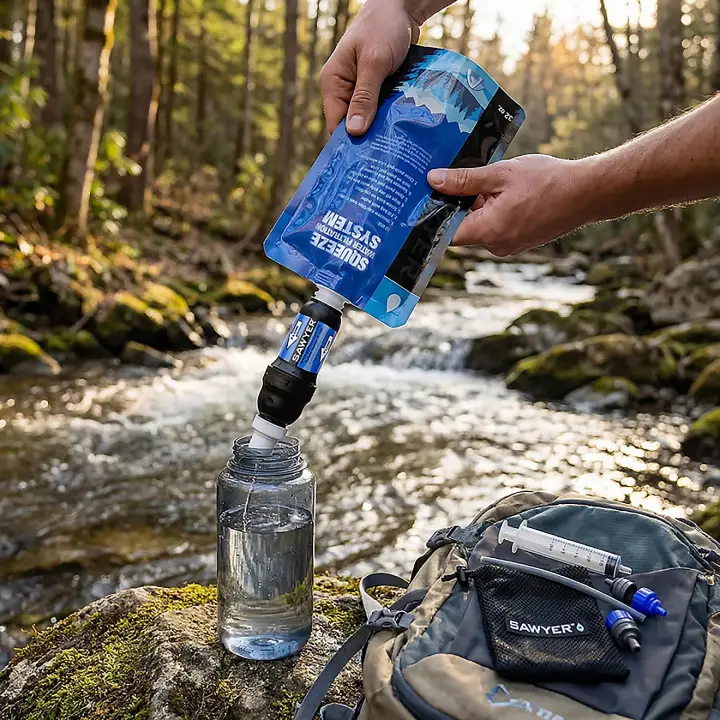
Bring enough water for the trail, weather, and your own drinking habits.
Water needs increase with:
- Heat
- Direct sun
- Elevation
- Strenuous climbing
- Heavy pack weight
- Dry air
- Long distances between sources
On routes with reliable natural water, carrying a filter allows you to refill rather than starting with every liter needed for the entire trip.
A product such as the Sawyer Squeeze Water Filter System works well for hikers who prefer filling a soft pouch and squeezing filtered water into a bottle. It weighs about 3 ounces and is easy to incorporate into a lightweight weekend setup.
Carry purification tablets as a backup, particularly on overnight trips. They add very little weight and can keep the trip moving if the main filter is damaged, lost, frozen, or clogged.
Never assume a water source will be flowing simply because it appears on a map. Check recent trail reports whenever possible.
10. Extra Clothes
Bring enough clothing to remain safe if temperatures fall, wind increases, or movement stops.
Depending on the conditions, this may include:
- A fleece
- An insulated jacket
- A rain shell
- A warm hat
- Gloves
- Dry socks
A sunny afternoon can turn into a cold evening quickly, particularly at elevation.
Your extra layers should stay protected from rain and sweat inside the backpack. 🌦️
Part 2: The “Big Three” for Overnight Trips
Your backpack, shelter, and sleep system usually account for most of the weight and volume in an overnight setup.
They also have the greatest influence on how comfortable you feel while walking and sleeping.
You do not need the lightest model in every category. You need equipment that fits your body, matches the expected conditions, and works well together.
1. Your Backpack
Choose a backpack based on fit before focusing on capacity or features.
A properly fitted pack should transfer much of the load to your hips rather than leaving all the pressure on your shoulders.
The hip belt should sit securely around your hip bones. The shoulder straps should follow your body without creating painful pressure points or large gaps.
Backpack Size for a Day Hike
A 20–35 liter backpack works well for most day hikes.
It provides enough room for:
- Water
- Food
- The Ten Essentials
- Rain protection
- An insulating layer
- Personal items
A 20- to 25-liter pack is often enough for mild-weather outings. A larger daypack makes sense when you need winter clothing, camera equipment, or supplies for other people.
The Osprey Talon 22 is a useful example of a versatile daypack. Its 22-liter capacity is large enough for the essentials without encouraging unnecessary packing, and its adjustable harness makes it easier to refine the fit.
Backpack Size for an Overnight Hike
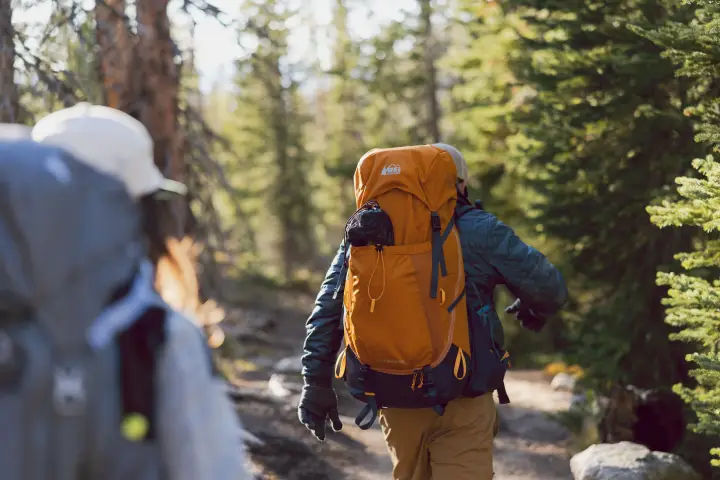
A 40–55 liter backpack is practical for many one-night, three-season trips.
This range usually provides room for:
- A compact shelter
- Sleeping bag or quilt
- Sleeping pad
- Food
- Cook kit
- Extra clothing
- Water treatment
The REI Co-op Flash 55 is one example that gives beginners enough capacity for a complete overnight setup while still offering an adjustable torso and supportive suspension. It can also be stripped down as equipment becomes lighter and more compact.
A larger backpack is not automatically more comfortable. Extra space often leads to extra packing.
Try the pack with weight inside before committing to it. A model that looks perfect online may not match your torso length, shoulder shape, or hip structure.
2. Your Shelter
Your shelter protects you from wind, rain, insects, and changes in nighttime temperature.
The best choice depends on the destination, expected weather, number of people, and your setup experience.
Backpacking Tent
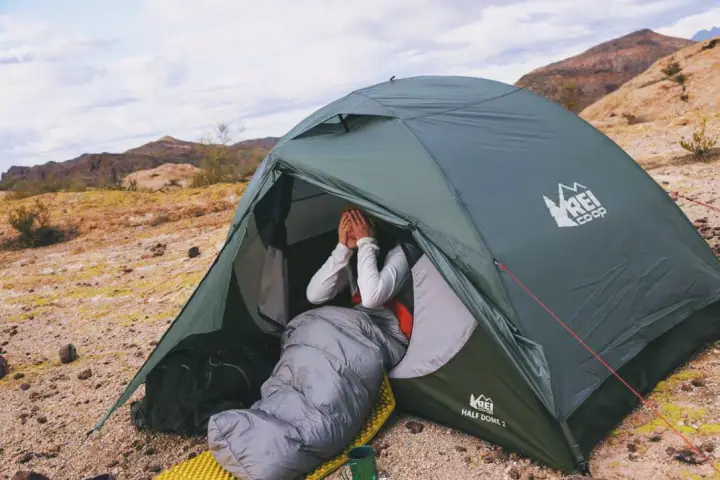
A backpacking tent is the most straightforward option for beginners.
Compared with a car-camping tent, it uses lighter materials and packs into a smaller space.
When comparing models, look beyond the stated capacity. Consider:
- Floor dimensions
- Peak height
- Vestibule storage
- Packed size
- Ventilation
- Weather protection
- Setup difficulty
- Total weight
The REI Co-op Half Dome 2 Tent with Footprint is a practical example for hikers who prioritize interior comfort and straightforward setup over having the lightest possible shelter. It provides 31.8 square feet of floor space and includes a footprint, but its comfort-oriented design makes it better suited to shorter backpacking trips than aggressive ultralight mileage.
For one person, a two-person tent provides room for gear and makes changing clothes easier. For two hikers, check the actual width and floor shape rather than assuming every two-person tent will feel spacious.
Practice pitching the tent at home. That gives you time to find missing stakes, confusing clips, damaged poles, or setup problems before reaching camp.
Tarp
A tarp can reduce weight and packed size, but it requires more skill.
You need to understand site selection, wind direction, drainage, and different pitching configurations. Tarps also provide less protection from insects and wind-driven rain.
Hammock
A backpacking hammock can be comfortable in wooded environments when paired with a rainfly and proper insulation underneath.
It is less practical above tree line, in deserts, in areas without suitable trees, and anywhere hanging is restricted. ⛺
3. Your Sleep System
Your sleeping bag and sleeping pad work together as one insulation system.
The bag or quilt slows heat loss to the surrounding air. The pad reduces heat loss into the ground.
Even a warm sleeping bag can feel cold when paired with an under-insulated pad.
Sleeping Bag or Quilt
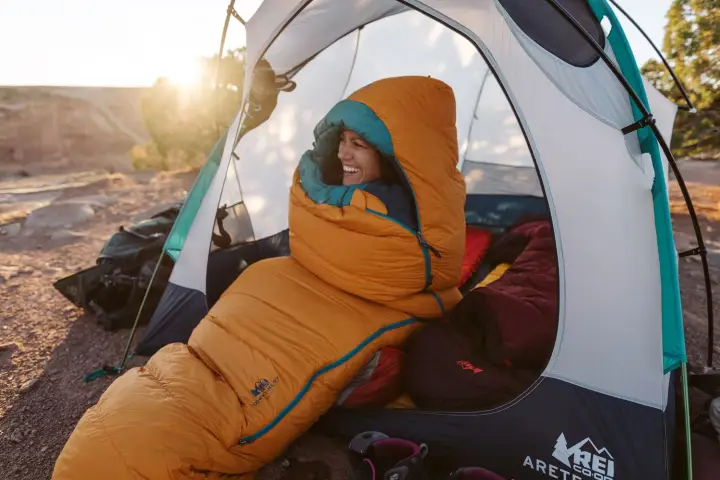
Choose a sleeping bag based on the lowest overnight temperature you realistically expect at the campsite—not the daytime high at the trailhead.
Some hikers naturally sleep warmer than others, so temperature ratings should be treated as a starting point rather than a guarantee.
The REI Co-op Magma 30 Sleeping Bag is an example for hikers who want a lightweight, compressible down bag for milder three-season conditions. It weighs under 2 pounds, depending on size, making it easier to fit into a weekend backpack.
For a more budget-conscious synthetic option, the REI Co-op Trailmade 25 Sleeping Bag provides a lower-priced entry into overnight hiking. It will take up more room than a premium down model, but it may be a more practical first purchase for occasional trips.
Down Insulation
Down is generally lighter and more compressible for its warmth.
It is a good fit when pack space and weight matter, but it usually costs more and needs to be protected carefully from moisture.
Synthetic Insulation
Synthetic insulation often costs less and retains useful insulation when damp.
It tends to be bulkier and heavier, but it can work well for wet climates, occasional backpackers, and hikers building a first setup on a limited budget.
Sleeping Pad
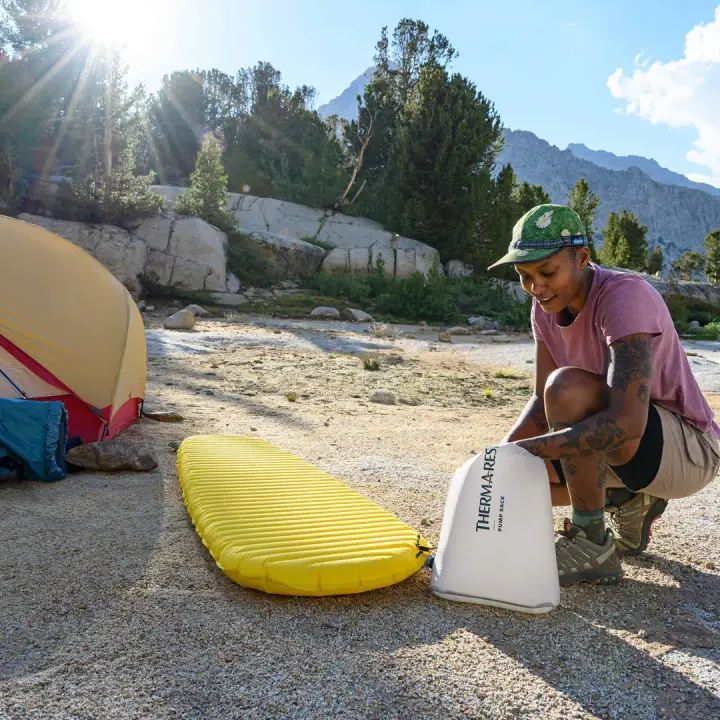
A sleeping pad provides both cushioning and insulation.
Its ability to resist heat loss is measured by its R-value. Higher numbers indicate more insulation from the ground.
Also consider:
- Pad width
- Pad thickness
- Packed size
- Inflation method
- Noise
- Sleeping position
The Therm-a-Rest NeoAir XLite NXT is an example for hikers who want a thick, highly packable pad without adding much weight. Its 3-inch thickness can also appeal to side sleepers who need more cushioning.
You do not need a premium ultralight pad for a first overnight trip. Comfort, warmth, reliability, and fit matter more than shaving away the final few ounces.
Test the complete sleep system at home before the trip.
Part 3: Clothing and Footwear
Good hiking clothing helps you manage sweat, wind, rain, sun, and temperature changes without carrying an entire closet.
The most useful approach is a layering system.
Layers let you remove insulation during a steep climb, put it back on during a break, and add weather protection when wind or rain arrives.
Avoid relying on cotton in cool or wet conditions. Cotton absorbs moisture and dries slowly, which can leave you cold when you stop moving.
Merino wool and synthetic fabrics manage moisture more effectively. 🧦
The Layering System
Base Layer
The base layer sits next to your skin and moves moisture away from your body.
Good materials include:
- Merino wool
- Polyester
- Nylon blends
Merino wool offers natural odor resistance and comfortable temperature regulation. Synthetic materials usually dry faster and often cost less.
Mid Layer
The mid layer provides insulation.
A fleece works well while moving because it allows heat and moisture to escape. A lightweight puffy jacket provides more warmth during long breaks and at camp.
On cooler trips, carrying both can be worthwhile:
- A breathable fleece for hiking
- An insulated jacket for rest stops and evenings
Outer Layer
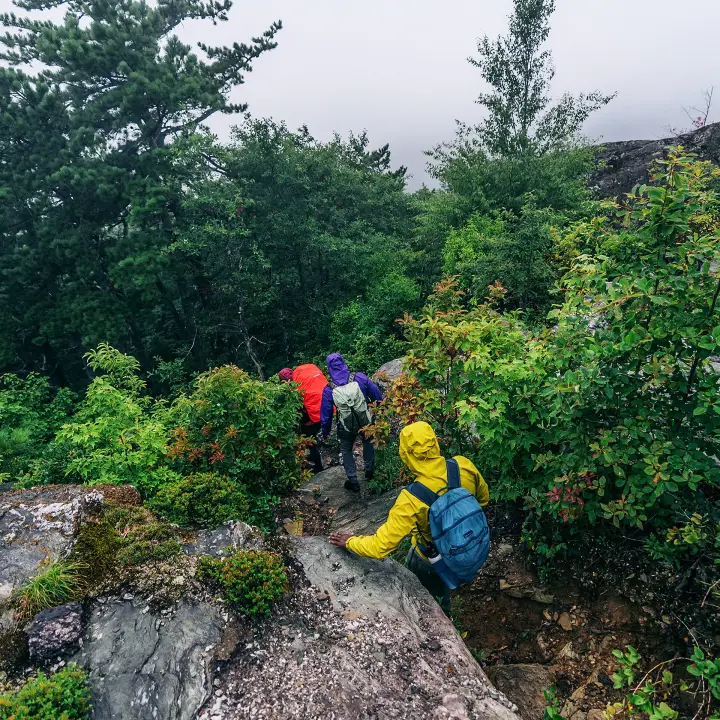
Your outer layer protects you from wind and precipitation.
A rain jacket should fit over your other layers and remain easy to reach.
The Patagonia Torrentshell 3L Jacket is an example of a durable three-layer shell that packs into its own pocket. It is not the lightest option available, but its weather protection and everyday versatility make it useful for hikers who want one rain jacket for both trails and regular travel.
Rain pants are also worth carrying when the forecast includes sustained rain, cold wind, wet vegetation, or long exposure above tree line.
Weekend Clothing Checklist
A practical clothing setup may include:
- Hiking shoes, trail runners, or boots
- Wool or synthetic socks
- Moisture-wicking underwear
- Hiking shorts or pants
- Base-layer top
- Fleece or active mid layer
- Packable insulated jacket
- Rain jacket
- Rain pants when needed
- Sun hat
- Warm beanie
- Gloves in cold conditions
- Dry sleep clothes for an overnight trip
For a one-night trip, you rarely need a complete second hiking outfit.
One dry base layer, clean sleeping socks, and appropriate insulation usually provide more value than several extra shirts and pants.
Choosing Hiking Footwear
You do not automatically need heavy boots for an overnight hike.
Trail runners and low-cut hiking shoes work well for many hikers on maintained trails, especially with lighter loads.
Boots may be preferable when you expect:
- Rough terrain
- Deep mud
- Cold conditions
- Wet vegetation
- Off-trail travel
- A heavier backpack
Fit and comfort matter more than the label on the shoe.
Test footwear on shorter hikes before taking it on a weekend trip. Pay attention to heel movement, toe space, rubbing, and pressure points.
Part 4: Food, Water, and Camp Kitchen Gear
Food should be easy to carry, simple to prepare, and appealing enough that you will actually eat it after several hours of hiking.
Keep snacks accessible so you can eat regularly without unpacking the backpack.
Useful options include:
- Trail mix
- Energy bars
- Dried fruit
- Jerky
- Nut-butter packets
- Crackers
- Tortillas
- Hard cheese
- Tuna packets
Choose food that you have already eaten during exercise. A remote campsite is not the ideal place to test a new energy gel or unfamiliar freeze-dried meal. 🍲
Kitchen Gear for an Overnight Trip
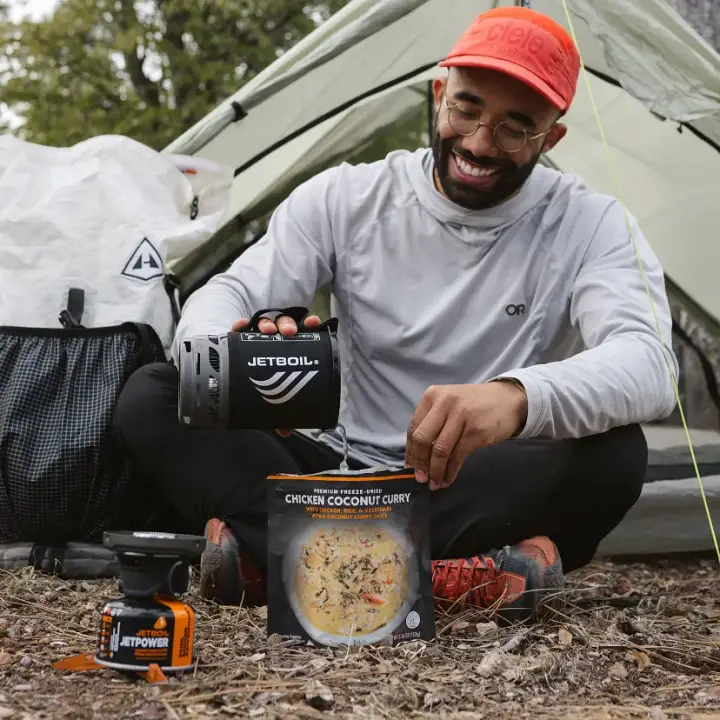
A simple cook kit is enough for most one-night hikes.
Stove and Fuel
A compact canister stove works well for boiling water during typical three-season trips.
For hikers who want a complete integrated system, the Jetboil Zip 0.8 L Fast Boil System provides a compact pot-and-stove setup suited to coffee, oatmeal, and dehydrated meals. It is a simpler and less expensive choice than carrying a larger cooking system intended for simmering more complex food.
The Jetboil Stash is lighter and more compact, making it a better fit for hikers willing to spend more to reduce pack weight.
Before leaving:
- Test the stove
- Check the fuel
- Pack a lighter
- Review local fire restrictions
Do not depend entirely on a stove’s built-in ignition.
Cook Pot
One small pot with a lid is usually enough for:
- Boiling water
- Making oatmeal
- Preparing instant meals
- Heating a basic dinner
If you plan to eat directly from a dehydrated-meal pouch, you only need enough pot capacity to boil the required water.
Utensil
A long-handled spoon or spork makes it easier to reach the bottom of meal pouches without covering your hands in food.
Mug
A separate mug is optional.
It may be worth the weight if coffee, tea, or hot chocolate is an important part of the experience. Otherwise, drinking from the cooking pot can simplify the setup.
Cleanup Supplies
Bring only what you need:
- A small scraper or sponge
- A tiny amount of biodegradable soap
- A bandana or quick-dry cloth
Keep soap and food residue away from lakes and streams, and follow local guidance for disposing of wastewater.
Easy Overnight Food Ideas
Dinner
Simple options include:
- Dehydrated backpacking meals
- Instant rice
- Couscous
- Ramen
- Instant mashed potatoes
- Tuna or chicken packets
- Freeze-dried vegetables
Dehydrated meals are convenient, but grocery-store foods can be less expensive and just as easy to prepare.
Breakfast
Keep breakfast simple so you can pack up without a long cleanup.
Options include:
- Instant oatmeal
- Granola
- Breakfast bars
- Nut-butter tortillas
- Dried fruit
- Instant coffee or tea
Lunch
Lunch does not need to involve cooking.
Tortillas, tuna packets, hard cheese, crackers, nut butter, and snack foods can be eaten quickly during a trail break.
Part 5: Hygiene, Bathroom Supplies, and Small Essentials
A compact hygiene kit makes an overnight trip more comfortable without adding much weight.
Transfer toothpaste, soap, sunscreen, and other products into small containers rather than carrying full-size packaging.
Bathroom Supplies
Depending on local regulations, you may need:
- A lightweight trowel
- Toilet paper
- Hand sanitizer
- Waste bags
- A sealable bag for used toilet paper
- A waste-carrying system where required
Not every environment allows catholes. Some alpine, desert, river, and heavily used areas require human waste to be packed out.
Check the rules before leaving.
Personal Hygiene
A simple overnight kit may include:
- Toothbrush
- Small amount of toothpaste
- Hand sanitizer
- Biodegradable wipes
- Lip balm
- Insect repellent
- Personal medications
Remember that scented items may need to be stored with food in bear country.
Repair and Utility Items
Useful small items include:
- Gear-repair tape
- Duct tape
- Spare cord
- Power bank
- Charging cable
- Trekking poles
- Quick-dry towel or bandana
- Earplugs
- Identification
- Permit
- Payment card or cash
Instead of carrying an entire roll of duct tape, wrap a few feet around a water bottle or trekking pole.
Emergency Communication
A satellite messenger may be worth carrying on remote routes without dependable cell service.
It does not replace navigation skills, the Ten Essentials, or a detailed trip plan.
Tell a trusted person:
- Where you are going
- Which route you plan to follow
- Where you expect to camp
- When you expect to return
- When they should contact authorities if you do not check in
How to Pack Your Backpack
Where you place equipment affects balance and comfort.
A well-packed backpack should feel stable without pulling you backward or shifting every time you step over a rock.
Bottom of the Pack
Place lightweight items you will not need while hiking near the bottom:
- Sleeping bag
- Sleep clothes
- Camp pillow
Keep them protected inside a waterproof liner.
Middle of the Pack
Place heavier items close to your spine and around the middle of your back:
- Food
- Cook kit
- Fuel
- Bear canister
This keeps the center of gravity close to your body.
Top of the Pack
Place items you may need quickly near the top:
- Insulated jacket
- Rain jacket
- First-aid kit
- Water filter
- Bathroom kit
Outside Pockets
Use outside pockets for items needed throughout the day:
- Water bottles
- Snacks
- Map
- Sunscreen
- Insect repellent
- Sunglasses
Avoid attaching too many loose objects to the outside. They can swing, snag on vegetation, become wet, or fall off.
How to Keep Gear Dry
Do not rely on a pack cover alone.
A pack cover helps protect exterior fabric and pockets, but rain can still enter around the back panel and suspension system.
Line the inside of the pack with a waterproof pack liner or durable trash-compactor bag.
Inside that liner, protect critical items such as:
- Sleeping bag
- Sleep clothes
- Insulated jacket
- Electronics
- Spare socks
Dry bags or waterproof stuff sacks add another layer of protection for anything that would create a safety problem if soaked.
What to Leave at Home
Removing unnecessary items is usually easier and less expensive than replacing everything with ultralight equipment.
Common items that add weight without providing much value include:
- Multiple hiking outfits
- Full-size toiletry bottles
- Cotton sweatshirts
- Large towels
- Heavy camp shoes
- Oversized knives
- Duplicate electronics
- Multiple cooking pots
- Extra cups and plates
- Excess food
- Large pillows
- Unnecessary packaging
Comfort items are not automatically a mistake.
A lightweight chair, camera, book, or camp pillow may be worth carrying when it noticeably improves the trip.
Make the decision deliberately. Know how much the item weighs and decide whether its comfort is worth carrying over every mile.
Final Packing Check
Before closing the backpack, confirm that you have a complete system for each basic need.
Navigation
- Offline map
- Paper map when appropriate
- Compass
- Charged phone
- Power bank
Warmth and Weather Protection
- Base layer
- Insulation
- Rain protection
- Warm accessories
- Dry sleep clothes
Water
- Enough carrying capacity
- Filter or purifier
- Backup treatment
Food
- Meals
- Snacks
- Extra no-cook food
- Required food-storage system
Shelter and Sleep
- Tent, tarp, or hammock system
- Sleeping bag or quilt
- Sleeping pad
- Stakes and poles
Safety
- First-aid kit
- Headlamp
- Emergency shelter
- Fire starter
- Repair tool
- Trip plan shared with someone at home
Mark items off only after they are physically inside the backpack.
An item left beside the front door will not help once you reach the trailhead. 🌲
Day Hike vs. Overnight Trip: What Changes?
An overnight packing list builds on the equipment already carried for a day hike.
The major additions are:
- A larger backpack
- A primary shelter
- A sleeping bag or quilt
- A sleeping pad
- Dry sleep clothes
- More food
- Water treatment
- Cooking equipment when needed
- Overnight hygiene supplies
- An approved food-storage system
Do not remove the Ten Essentials simply because you are carrying a tent and stove.
Navigation, emergency shelter, extra food, extra clothing, and a headlamp still need to remain accessible while you hike.
Who This Weekend Hiking Packing List Is For
This list is designed for beginner and intermediate hikers traveling on established trails in typical spring, summer, and fall conditions.
It works well for:
- Local day hikes
- Full-day mountain hikes
- One-night backpacking trips
- Established backcountry campsites
- Moderate three-season conditions
- Hikers preparing for a first overnight trip
- Backpackers trying to remove unnecessary gear
This list is not intended for:
- Winter backpacking
- Mountaineering
- Technical climbing
- Severe alpine conditions
- Extreme desert routes
- Long trips between water sources
- Expeditions requiring specialized equipment
Those trips require additional skills, planning, and gear.
A packing list is a useful starting point, but it cannot account for every trail or weather pattern. Review the specific route and adjust the list before every trip.
Frequently Asked Questions
1. How heavy should a backpack be for a weekend hike?
A day-hiking pack often weighs around 10–15 pounds once water and food are included.
For a one-night backpacking trip, keeping the total weight below 30 pounds is a reasonable goal for many hikers. A pack closer to 20–25 pounds may feel more comfortable, but the appropriate weight depends on the weather, water carry, shelter, food, and equipment available.
Do not remove essential safety gear simply to reach a target number.
2. What is the easiest food to bring on an overnight hike?
Dehydrated meals are one of the easiest dinner options because they only require boiling water.
For breakfast and lunch, instant oatmeal, tortillas, nut butter, tuna packets, trail mix, dried fruit, cheese, and energy bars require little preparation.
Choose foods that are familiar, easy to digest, and appealing after several hours of hiking.
3. Are all Ten Essentials necessary for a short hike?
Yes, although the size and complexity of each item should match the route.
A short hike can become much longer because of an injury, navigation mistake, storm, trail closure, or slower pace.
A compact headlamp, emergency shelter, extra food, first-aid kit, and protective layer add relatively little weight compared with the problems they can help manage.
4. What is the best way to keep hiking gear dry?
Use a waterproof liner inside the backpack.
Place the sleeping bag, insulated clothing, sleep clothes, and electronics inside waterproof bags or dry sacks.
A pack cover can help protect exterior pockets and fabric, but the internal liner should provide the main protection for critical gear.
5. How much water should be carried?
There is no single amount that works for every hike.
Water needs depend on temperature, distance, elevation gain, humidity, body size, pace, and access to reliable sources.
Carry enough capacity for the longest dry section of the route, along with a margin for unexpected delays.
6. Is a 40-liter backpack large enough for one night?
A 40-liter backpack can be enough when the shelter and sleep system are compact.
Hikers carrying a bulky synthetic sleeping bag, cold-weather clothing, bear canister, or shared equipment may need more space.
A pack between 45 and 55 liters is often easier for beginners to organize.
7. Are hiking boots required for an overnight trip?
No.
Trail runners and low-cut hiking shoes work well on many maintained trails, especially when carrying a lighter load.
Boots may be preferable for rough terrain, mud, cold conditions, wet vegetation, or hikers who prefer more structure.
Fit and comfort matter more than the footwear category.
8. What should be worn for sleeping?
Pack a dry base-layer top and bottom along with clean socks.
Keep these clothes protected from rain and hiking sweat.
Dedicated sleep clothes help keep the sleeping bag cleaner and ensure that you have something dry to wear if your hiking clothes become wet.
9. Is a stove necessary for a one-night hike?
No.
A no-cook menu can reduce weight and simplify the trip, particularly in warm weather.
A stove is useful when you want a hot dinner, warm breakfast, coffee, tea, or additional comfort in cold conditions.
10. What belongs in a weekend first-aid kit?
A basic kit should include:
- Adhesive bandages
- Gauze
- Medical tape
- Antiseptic wipes
- Blister treatment
- Pain relief
- Tweezers
- Gloves
- Personal medications
Adjust the kit for the group size, trip length, known medical needs, and distance from help.
Affiliate Disclosure: GearForTheOutdoors.com participates in affiliate programs, including REI, Amazon, Garage Grown Gear, Darn Tough, Jackery, Luno, Outdoor Research, Booking.com, Campspot, GetYourGuide, 57hours, and other trusted partners. When purchases are made through links on this site, GearForTheOutdoors.com may earn a small commission at no extra cost to the reader. This helps support practical, useful outdoor gear content.
Disclaimer: This post is for informational purposes only. Always verify current product details, fit, availability, safety information, local regulations, trail conditions, and manufacturer warranties before purchase or use. Outdoor conditions and gear performance can vary depending on setup, weather, terrain, and experience level.