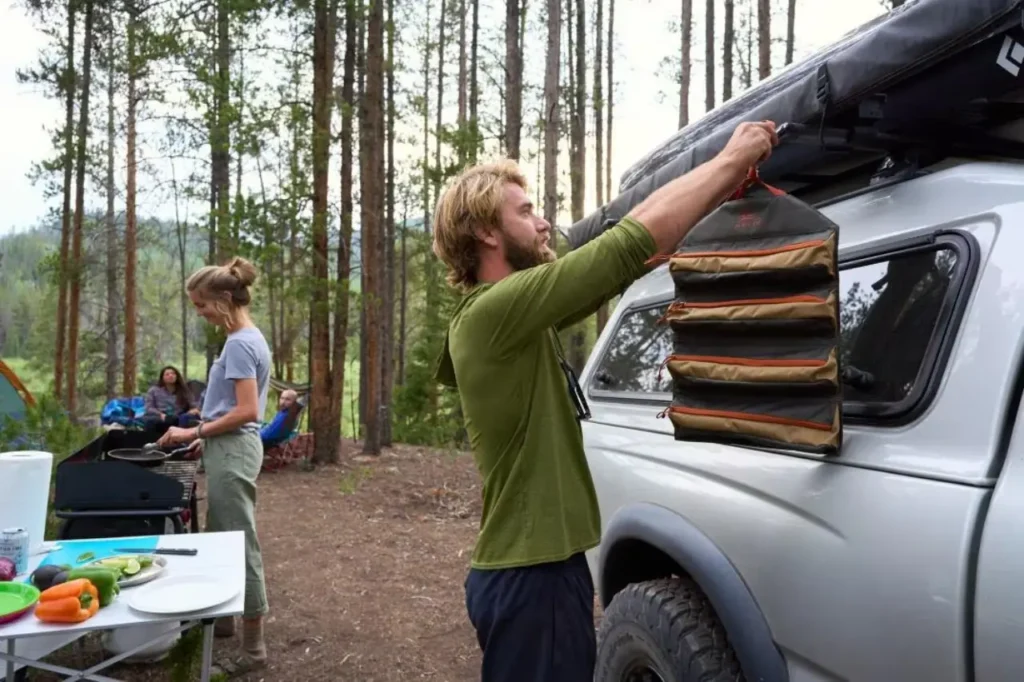
Outdoor gear has a habit of spreading.
A backpack starts near the front door. Hiking boots claim the corner beside it. Sleeping bags fill the top shelf, while trekking poles, cookware, headlamps, and repair supplies slowly take over every remaining gap.
In an apartment, condo, or small home, it does not take much gear before the space starts feeling crowded.
The answer is not to cram everything into the nearest plastic tote. A good small-space outdoor gear storage system should make your home easier to live in, protect your equipment between trips, and help you get packed without emptying an entire closet onto the floor.
The most useful setup is usually simple:
- Frequently used gear stays easy to reach.
- Bulky or seasonal items move higher or farther back.
- Equipment that needs airflow is not sealed away.
- Related items are stored together.
- Everything has a clear place to return after a trip.
With a few shelves, thoughtfully chosen bins, and better use of vertical space, even one closet can hold a surprisingly capable outdoor setup. 🏕️
This guide walks through the full process, from sorting and cleaning your gear to organizing tents, sleeping bags, footwear, backpacks, camp kitchen equipment, and all the small accessories that are so easy to lose.
The Three Golden Rules of Gear Storage
Before buying organizers or installing shelves, start with three basic rules.
These principles do more for your gear—and your available space—than any single storage product.
1. Clean, Dry, Store
Never put away gear that is damp, muddy, or covered in food residue.
A slightly wet tent can develop mildew while folded. Moisture left inside boots can create stubborn odors. Food crumbs hidden in a backpack pocket may attract insects or rodents.
After every trip:
- Empty every pocket and compartment.
- Shake out dirt, sand, pine needles, and crumbs.
- Clean the item according to the manufacturer’s instructions.
- Let it dry completely.
- Inspect it before returning it to storage.
Pay extra attention to gear with folds, seams, liners, or hidden layers. A rainfly may feel dry on the outside while moisture remains trapped around the hem or inside the folds.
Boots also take longer to dry than they appear. Remove the insoles, loosen the laces, and give the toe box and lining enough airflow before putting them away.
Cleaning and drying gear may not be the most exciting part of unpacking, but it is one of the easiest ways to prevent mildew, odors, coating damage, and premature wear.
2. Go Vertical
Floor space disappears quickly in a small home.
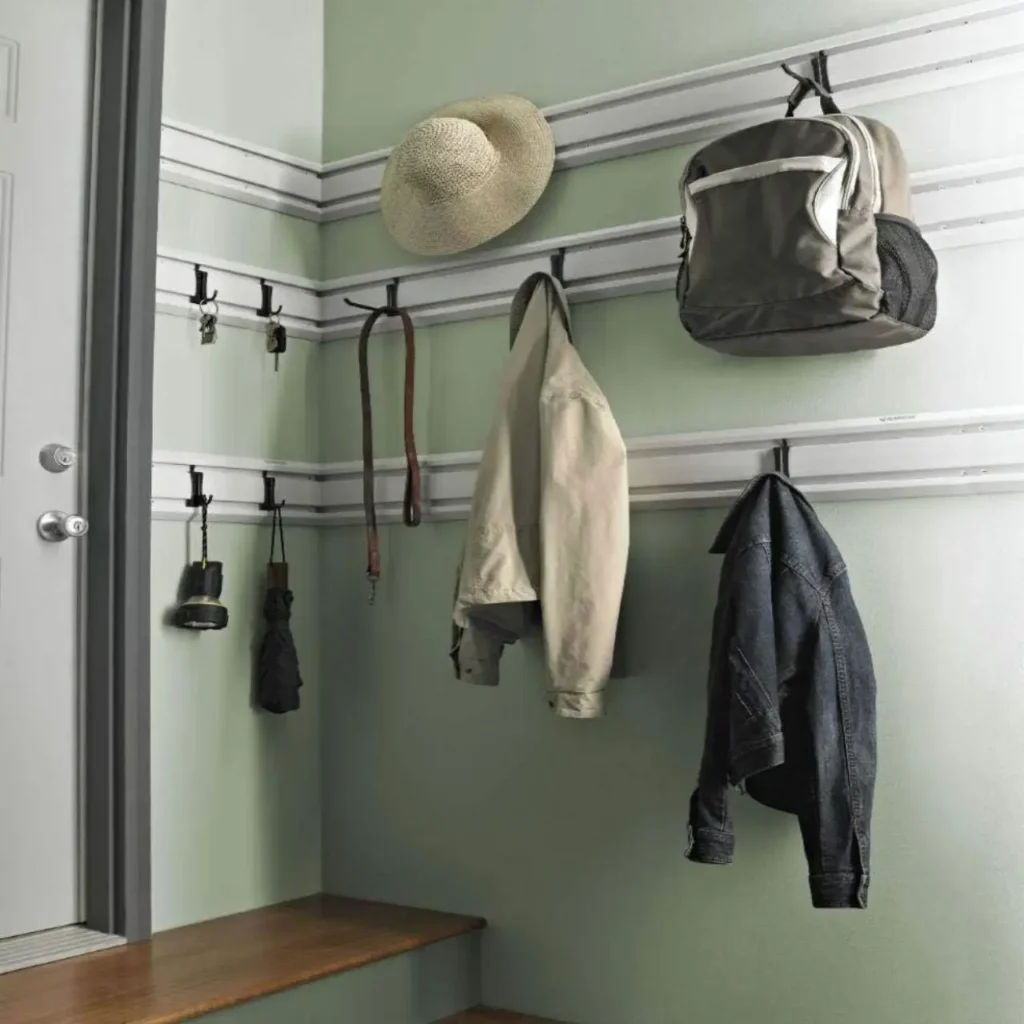
Walls, doors, high shelves, and the space above a closet rod often provide more useful storage than the floor itself. Pegboards, wall rails, hooks, over-the-door organizers, and adjustable shelving can turn these overlooked areas into practical gear zones.
Moving backpacks, helmets, trekking poles, and camp chairs off the floor also makes the space easier to clean and reduces the chance of gear being stepped on or knocked over.
Renters can still take advantage of vertical space. Freestanding shelves, tension rods, over-the-door organizers, and removable hooks can add storage without requiring permanent installation. 🧗
3. Store Gear by Activity
Avoid creating one large bin labeled “Camping.”
That usually leads to camp utensils mixed with headlamp batteries, tent stakes tangled with rain jackets, and first-aid supplies buried under cookware.
Instead, group items according to how they are used:
- Camp kitchen
- Tent and shelter
- Sleep system
- Day hiking
- Backpacking accessories
- Water treatment
- First aid and repair
- Lighting and electronics
- Winter gear
- Climbing equipment
This approach makes packing much easier because each container already holds a working kit.
A camp kitchen bin, for example, can hold cookware, plates, mugs, utensils, dishwashing supplies, a cutting board, and a stove. Before a trip, the whole kit can be checked, restocked, and loaded without searching through several different rooms.
Step 1: The Pre-Organization Purge—Sort, Clean, and Repair
It is difficult to create an effective storage system around gear that is broken, uncomfortable, or never used.
Start by gathering everything in one place. Check the obvious areas, but also look under the bed, behind doors, in vehicle trunks, and at the back of closets.
Then sort the collection into four groups.
- Keep: Gear that fits, works properly, and is used regularly.
- Repair: Equipment with a problem that can realistically be fixed.
- Donate or sell: Functional gear that no longer suits your needs.
- Recycle or discard: Unsafe, expired, contaminated, or irreparably damaged equipment.
This is the right time to be honest about duplicates.
Extra headlamps may be useful for guests or emergencies. Three backpacks that all fit poorly are simply taking up space that could be used for gear you enjoy using.
The repair pile also needs a deadline. A torn jacket or leaking sleeping pad should not spend another year waiting for attention. Add the repair to your calendar, send the item to a professional, or let it go.
Prepare Every Item for Storage
Once the collection has been reduced, clean and inspect what remains.
Wipe down tent stakes and trekking poles. Empty backpacks completely. Wash muddy apparel. Remove batteries from electronics that will not be used for several months.
Clean camp cookware carefully and check that no grease, crumbs, or food odors remain inside nested pots.
Use this time to inspect:
- Tent seams and waterproof coatings
- Sleeping pad valves
- Stove connections
- Backpack buckles and webbing
- Boot soles and laces
- Water-filter components
- Headlamp batteries
- First-aid expiration dates
- Repair tape, patches, and adhesives
Gear should return to storage ready for its next trip.
That way, packing does not begin with discovering a dead battery, a missing tent stake, or a sleeping pad that still needs to be patched. 🔧
Mastering Your Primary Storage Space: The Gear Closet
For many apartment dwellers, one closet becomes the main outdoor gear zone.
The easiest way to make that closet work is to divide it into sections based on weight and frequency of use.
- Top shelves: Lightweight or seasonal items
- Eye-level shelves: Gear used most often
- Lower shelves: Heavy bins, cookware, and footwear
- Closet rod: Backpacks and lightweight hanging gear
- Door: Small accessories
Frequently used equipment should stay between waist and shoulder height whenever possible. That makes it easy to reach without moving several other bins.
Heavy containers belong near the floor. Sleeping bags, quilts, and insulated clothing can go higher because they are lighter and less likely to cause an injury if something shifts.
Seasonal gear can move to the least accessible areas. Snow equipment can take the top shelf during summer, while warm-weather gear moves there during winter.
Bins and Totes: The Foundation of Organization
Bins turn loose gear into compact, movable kits.
The right type depends on what you are storing, where it will live, and how often it needs to move.
| Bin Type | Pros | Cons | Best For |
|---|---|---|---|
| Clear plastic bins | Easy to see inside; lightweight; widely available; usually stackable | Lower-quality models can crack; sealed lids may trap moisture | Camp kitchen supplies, repair kits, electronics, dry clothing |
| Opaque heavy-duty totes | Durable; protective; stable when stacked; block light | Contents are hidden; heavier than basic bins | Tools, climbing hardware, bulky gear, long-term storage |
| Soft-sided gear bins | Easy to carry; collapsible; convenient for vehicle loading | Less protection from pests, crushing, and moisture | Car-camping kits, bedding, clothing, frequently transported gear |
| Fabric storage cubes | Lightweight; tidy on shelves; collapsible when empty | Not suitable for heavy items; limited moisture protection | Baselayers, socks, hats, gloves, and other soft goods |
| Open baskets | Good airflow; quick access; useful near an entryway | Do not protect from dust or pests | Dry footwear, trekking poles, and grab-and-go gear |
Clear containers are convenient, but they should still be labeled. Once several bins are stacked together, the item you need is rarely pressed neatly against the visible side.
Specific labels work best:
- Camp Kitchen and Cleanup
- Tent, Stakes, and Footprint
- Water Filters and Bottles
- Headlamps, Batteries, and Chargers
- Backpacking Repair Kit
- Winter Gloves and Accessories
A removable inventory card can make the system even easier to maintain. Place an index card inside a clear label holder and list the main contents. When the kit changes, update the card rather than replacing the entire label.
Small-space tip: Choose two or three standard bin sizes instead of collecting containers in every possible shape. Matching footprints stack more efficiently and waste less shelf space.
Choose Bins That Fit the Way You Camp
Rigid totes are usually best for a closet because they stack securely and protect the contents from dust, pests, and pressure.
Soft-sided bins are more useful when the same container needs to move between your home and vehicle.
The REI Co-op Trailgate Gear Bin works especially well for car-camping kits, bedding, cookware, footwear, and other gear that needs to be carried regularly. Its collapsible design also makes it easier to store when empty.
Use it for lighter, bulkier items rather than dense tools or hardware. A soft-sided bin is convenient to carry, but it will not provide the same stable vertical stacking as a rigid plastic tote.
Smaller REI Co-op Trailgate Gear Cubes can separate items inside a larger bin. One cube might hold cooking utensils and cleanup supplies, while another contains headlamps, batteries, repair tape, and charging cables.
This kind of modular setup is helpful when one large bin contains several smaller systems.
Shop the REI Co-op Trailgate storage collection.
Shelving Is Your Best Friend
Most closets come with one shelf and a large amount of wasted air beneath it.
Adjustable shelving allows each level to match the height of the equipment stored there. A short bin no longer needs to occupy a tall opening, and small accessories do not have to sit in an unstable pile.
Useful options include:
- Adjustable wire shelving: Affordable, ventilated, and easy to configure.
- Solid wood or MDF shelving: Better for small items that might fall through wire.
- Freestanding metal racks: Ideal for renters or closets where drilling is not allowed.
- Shelf risers: Helpful for dividing a tall shelf into two usable levels.
- Hanging closet shelves: Best for clothing and lightweight accessories.
Wire shelving encourages airflow, which is useful for outdoor gear, but narrow items can tip or catch between the wires. Add a thin shelf liner where needed.
Place cookware, tools, and other dense items on lower shelves. Sleeping bags, insulated jackets, and soft goods can occupy the upper levels.
Use the Closet Rod for More Than Jackets
A closet rod can hold backpacks, trekking poles, helmets, and other awkward items.
Hang empty backpacks from sturdy hooks or broad hangers. Avoid leaving a loaded pack suspended by a thin haul loop for months, since the weight can strain the stitching.
Large S-hooks can hold:
- Empty backpacks
- Trekking poles
- Helmets
- Camp chairs
- Hydration reservoirs
- Stuff sacks
- Lightweight tote bags
Carabiners are also useful for organizing water bottles, straps, and small accessories.
Retired or decorative carabiners should be marked clearly and stored separately from climbing equipment. Anything with an uncertain history should never find its way back into a load-bearing system.
Turn the Closet Door Into Small-Gear Storage
An over-the-door organizer can solve one of the most frustrating gear-storage problems: what to do with all the little items.
Use the pockets for:
- Headlamps
- Spare batteries
- Charging cables
- Sunscreen
- Insect repellent
- Water-treatment tablets
- Multi-tools
- Tent-repair supplies
- First-aid refills
- Lighters and fire starters
- Small dry bags
- Camp utensils
- Hand warmers
Clear or mesh pockets make it easier to see what is inside.
Check the organizer’s depth before buying. Heavier items may fall forward when the door moves, and thick hooks can prevent some doors from closing properly.
Avoid placing fuel, sharp tools, or heavy hardware in a door organizer. Those items need a more secure location.
Browse over-the-door organizers on Amazon.
Going Vertical: Wall-Mounted Small-Space Outdoor Gear Storage
Once the closet is organized, look for a blank wall that could hold a compact gear station.
An entryway, office, hallway, or laundry area can provide useful storage without making the room feel crowded.
The key is to keep the display contained. One organized section of wall usually looks much cleaner than a scattering of hooks throughout the home.
Pegboard and Slatwall Systems
Pegboards are ideal for gear that is awkward to stack but useful to keep visible.
They work well for:
- Climbing harnesses
- Chalk bags and slings
- Camp utensils
- Headlamps
- Repair tools
- Water bottles
- Small dry bags
- Bike tools
- Charging cables
- Trekking-pole accessories
Hooks, baskets, and small shelves can be rearranged as your gear changes.
A summer setup might hold hiking accessories and water bottles. In winter, the same board can be reorganized for gloves, traction devices, and hand warmers.
Traditional pegboard is affordable and lightweight. Metal pegboard and slatwall systems offer more support for heavier equipment.
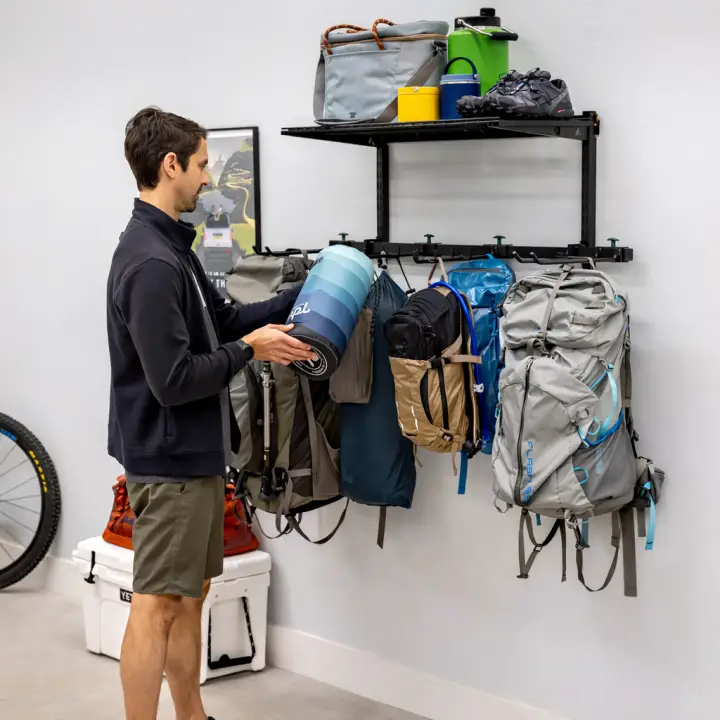
The Gladiator GearTrack system can hold movable hooks, baskets, and racks along a wall-mounted track. It is especially useful in a utility room, garage, storage area, or dedicated gear corner where heavier items need more support.
Browse Gladiator GearTrack options on Amazon.
Before installing any wall system:
- Check the wall material.
- Locate studs when required.
- Follow the manufacturer’s mounting instructions.
- Confirm the weight limit.
- Include the weight of hooks and accessories.
- Get permission before drilling in a rental.
Adhesive hooks are useful for light accessories, but they should not support bicycles, skis, loaded backpacks, or other heavy gear.
Wall-Mounted Racks for Bulky Gear
Skis, snowboards, bicycles, paddles, and trekking poles consume a large amount of floor space because of their shape.
Dedicated racks keep these items aligned, protected, and out of walking areas.
Horizontal storage often works well for skis, snowboards, and paddles. Vertical bike racks can save more wall space, but check that the handlebars and wheels will not block a door or narrow hallway.
Use padded hooks wherever possible. Hard metal contact points can scratch bike frames, damage board finishes, or wear against paddle shafts.
Clean and dry equipment before placing it on the wall. A rack should not become a permanent dripping station for muddy tires or wet skis. 🚲
Let a Few Pieces of Gear Double as Decor
Some gear is attractive enough to stay visible.
A favorite daypack, vintage ice axe, colorful snowboard, wooden paddle, or framed topographic map can add personality to a room while freeing closet space.
Keep the display selective. One or two well-placed items can look intentional. An entire wall covered in unrelated gear usually feels more cluttered than organized.
Avoid displaying safety equipment in direct sunlight. Helmets, harnesses, ropes, and technical fabrics can gradually degrade from heat and UV exposure.
Gear-Specific Storage Solutions
Outdoor gear is made from different materials, and each type has its own storage needs.
Some equipment handles compression well. Other items need loft, airflow, or protection from heat and sunlight.
The goal is not simply to make everything fit. The goal is to make it fit without shortening its useful life.
Tents and Shelters
A tent must be completely dry before storage.
Even a small amount of moisture trapped inside folded fabric can lead to mildew, odors, peeling seam tape, and damaged waterproof coatings.
Before storing a tent:
- Shake out dirt, sand, and debris.
- Dry the tent body, rainfly, footprint, and stuff sacks separately.
- Check the floor, reinforced corners, and pole sleeves for moisture.
- Store the fabric loosely.
- Use a breathable cotton or mesh bag.
- Keep it in a cool, dry location.
- Avoid hot attics, damp basements, and direct sunlight.
Do not leave the tent tightly compressed in its backpacking stuff sack for months. The small sack is designed for transportation, not long-term storage.
An old pillowcase can work well as a breathable storage bag.
Clean tent stakes before putting them away and keep them in their own pouch. Separating metal stakes from loosely folded tent fabric reduces the chance of accidental punctures.
Sleeping Bags and Quilts
Sleeping bags and quilts rely on loft to keep you warm.
When the insulation remains tightly compressed for months, it may lose some of its ability to expand and trap warm air.
The small stuff sack belongs in your backpack. At home, use:
- The oversized storage sack supplied with the bag
- A large cotton or mesh laundry bag
- A wide shelf where the bag can rest loosely
- A clean, dry area beneath the bed
- A broad hanger when the manufacturer allows hanging
Keep sleeping bags away from moisture, pests, and sharp objects.
A breathable sack helps prevent trapped odors, but it will not protect a sleeping bag in a damp room or beneath a leaking pipe.
Sleeping Pads
The best storage method depends on the type of pad.
Self-Inflating Sleeping Pads
Store self-inflating pads unrolled with the valve open whenever space allows.
This helps the internal foam stay expanded and allows moisture to escape.
Good storage locations include:
- Flat beneath a bed
- Upright behind a dresser
- Along the back wall of a closet
- On a shelf without heavy bins on top
Keep the pad away from sharp edges and pet claws.
Inflatable Air Pads
Air pads can usually be stored loosely rolled or folded according to the manufacturer’s instructions.
Make sure the pad is clean and dry. Avoid creating the same sharp fold every time, since repeated creasing can stress the fabric.
Leaving the valve open may help trapped moisture escape, but follow the care instructions for your specific pad.
Closed-Cell Foam Pads
Closed-cell foam pads are the least demanding.
They can usually stay rolled or folded without damaging the insulation. Their main challenge is simply finding a place for their bulky shape.
Wall straps, a tall basket, or the back of a closet can keep them upright and out of the way.
Backpacks
A backpack should go into storage empty, clean, and dry.
Check every compartment, including hipbelt pockets, lid pockets, and hydration sleeves. Small amounts of food residue can attract pests even when the main compartment looks clean.
Before storing:
- Remove all food and trash.
- Empty the hydration sleeve.
- Loosen the compression straps.
- Release the hipbelt.
- Clean dirt from zippers and buckles.
- Let damp pockets dry completely.
Store the pack flat on a shelf or hang it from a broad, sturdy support.
Avoid stacking heavy bins on top of the frame, shoulder straps, or hipbelt. Keep the pack away from prolonged direct sunlight, which can fade and weaken the fabric.
Hiking Footwear
Boots and trail shoes need airflow.
Brush away dried mud, remove stones from the tread, and let the inside dry completely.
Remove the insoles when the footwear is especially wet. This allows moisture trapped beneath them to escape.
A small rack near the front door or on the closet floor keeps footwear accessible without sealing it inside a bin.
Avoid:
- Airtight containers
- Damp storage rooms
- Direct heat from radiators
- Hair dryers
- Storing boots while muddy
- Placing heavy items on top of the uppers
Newspaper can absorb moisture in a pinch, but replace it once it becomes damp.
For frequent wet-weather hikers, a low-heat or no-heat boot dryer can make post-trip cleanup easier.
Camp Kitchen Gear
A dedicated camp kitchen bin can remove a major step from trip preparation.
Keep the equipment used together in the same container:
- Stove
- Cookware
- Plates and bowls
- Cups
- Utensils
- Cutting board
- Can opener
- Coffee setup
- Dish soap
- Sponge or scraper
- Trash bags
- Towels
- Foil and reusable containers
Clean and dry everything before closing the bin.
Cooking oil, crumbs, and food residue can create odors and attract pests. Remove food, spices, and scented products between trips, even when they appear to be sealed.
Fuel Safety
Fuel canisters need a separate, carefully chosen storage area.
Keep them upright and away from:
- Heat sources
- Stoves and heaters
- Direct sunlight
- Sparks and flames
- Areas exposed to excessive temperatures
- Children and pets
Leave the protective caps in place and inspect each canister for dents, rust, leaks, or valve damage.
Storage rules vary by fuel type, building, lease, and local fire code. Check the manufacturer’s directions and the requirements for your home rather than assuming a balcony, vehicle, closet, or storage locker is suitable.
Never return a leaking or damaged fuel canister to storage.
Bear Canisters
Clean bear canisters thoroughly before bringing them indoors.
Remove all food residue and let the container air out. Store it with the lid removed or loosely secured so odors and moisture do not remain trapped inside.
The empty interior can hold clean, odor-free camp items, but avoid packing it so tightly that it becomes difficult to inspect before a trip.
Climbing Equipment
Climbing gear should be stored away from chemicals, heat, moisture, sunlight, sharp tools, and fuel.
Keep ropes loosely flaked in a rope bag rather than hanging them for months from a narrow hook. Store harnesses and slings without heavy objects pressing against them.
Separate climbing equipment from:
- Cleaning products
- Paint and solvents
- Fuel canisters
- Batteries
- Sharp tools
- Pet-accessible areas
Clearly mark retired carabiners, ropes, slings, and harnesses so they cannot accidentally return to active use.
Our Favorite Versatile Gear Storage Products
The most useful storage products solve a clear problem.
A new bin will not help if it becomes another place to hide unrelated gear. Choose products that fit the way you store, pack, and use your equipment.
REI Co-op Trailgate Gear Bin
The REI Co-op Trailgate Gear Bin works well for campers who want one container to serve as both home storage and a travel-ready gear bin.
Its soft-sided, collapsible design is useful for:
- Camp kitchen equipment
- Sleeping gear
- Footwear
- Clothing
- Car-camping accessories
- Large activity-based kits
It is easy to carry and can be flattened when empty.
A rigid tote is still the better choice when you need stable stacking, stronger pest protection, or a hard shell around fragile equipment.
Shop the REI Co-op Trailgate Gear Bin.
REI Co-op Trailgate Gear Cube
The smaller REI Co-op Trailgate Gear Cube helps divide a large bin into more manageable sections.
Use one cube for kitchen utensils and cleanup supplies, another for lighting and electronics, and another for repair gear.
These cubes are especially useful inside soft-sided bins and duffels where small items would otherwise settle at the bottom.
They are less useful for readers who already store everything in small, rigid, labeled containers.
Shop the REI Co-op Trailgate Gear Cube.
Nite Ize Gear Ties
Nite Ize Gear Ties are reusable rubber-coated ties with a flexible wire core.
They are useful for:
- Bundling tent poles
- Keeping trekking poles together
- Organizing charging cables
- Containing loose backpack straps
- Securing rolled sleeping pads
- Hanging lightweight accessories
Different lengths work better for different tasks. Short ties are useful for cables and utensils, while longer versions can wrap around poles or bulky gear.
Do not use them as a replacement for climbing hardware, structural hooks, or load-rated tie-down straps.
Shop Nite Ize Gear Ties at REI.
Over-the-Door Pocket Organizer
An over-the-door organizer is one of the most useful storage upgrades for a small gear closet.
It gives headlamps, sunscreen, tools, batteries, repair tape, and water-treatment supplies a visible place of their own.
Look for:
- Clear or mesh pockets
- Reinforced seams
- Hooks that fit the door
- Enough clearance for the door to close
- Pockets deep enough for the intended items
Browse over-the-door organizers on Amazon.
Freestanding Adjustable Shelving
A freestanding shelf is often the easiest way to use the full height of a closet or spare corner.
It is especially useful for renters because it can be installed without drilling and moved later.
Choose a unit with:
- Adjustable shelf spacing
- A load rating that matches your gear
- Enough depth for your bins
- Stable feet
- Dimensions that fit through the closet opening
Measure the doorway and baseboards, not just the interior wall. A shelving unit may technically fit inside the closet but still be impossible to move through the opening.
Browse adjustable storage shelving on Amazon.
Final Thoughts: Organization Is Freedom
Good small-space outdoor gear storage does not need to look like a showroom.
It needs to make daily life easier, protect your equipment, and reduce the amount of effort required to leave for a trip.
Start by keeping only gear that is safe, functional, and useful. Clean and dry everything before storing it. Group related items into kits, keep frequently used equipment within easy reach, and move seasonal gear to the highest or least accessible areas.
Use bins to contain, shelves to create structure, doors to organize small items, and walls to hold long or awkward equipment.
Most importantly, store each item in a way that protects its materials. A sleeping bag needs room to loft. Boots need airflow. A tent needs to be completely dry. Fuel needs a safe, separate location.
When everything has a clear place, packing becomes much easier.
The tent is ready. The sleeping bag is not crushed beneath a pile of gear. The camp kitchen is already together. The headlamp is exactly where it should be.
That is the real benefit of an organized gear system: less time searching through closets and more time getting outside. 🌲
Frequently Asked Questions
Can outdoor gear be stored in a garage, attic, or storage unit?
It depends on the conditions.
Garages and attics may experience high humidity, extreme heat, freezing temperatures, pests, and large temperature swings. Those conditions can damage adhesives, waterproof coatings, foam, batteries, electronics, and insulated gear.
A dry, insulated garage may work for durable equipment stored in protective containers.
Sensitive items such as sleeping bags, tents, water filters, electronics, and technical clothing are usually better kept in a climate-controlled area.
A climate-controlled storage unit can be useful when apartment space is extremely limited, but the gear should still be clean, dry, labeled, and protected from pests.
Is it really bad to store a sleeping bag in its stuff sack?
Yes, especially for long periods.
The insulation needs room to expand. Leaving the bag compressed for months can reduce its loft and create areas that do not retain warmth as effectively.
Use the small stuff sack for transportation. At home, place the sleeping bag in a larger storage sack, spread it flat, or store it loosely on a shelf.
What is the best way to label storage bins?
Use labels that describe the complete kit.
“Camp Kitchen and Cleanup” is more useful than “Camping.” “Headlamps, Batteries, and Chargers” is more useful than “Small Gear.”
A removable inventory card is especially helpful when the contents change throughout the year.
How can outdoor gear be kept from smelling musty?
Make sure every item is completely dry before storage.
Use breathable storage bags for tents and sleeping bags. Avoid sealing damp clothing or footwear inside plastic containers. Allow air to circulate around items that tend to retain moisture.
Moisture absorbers can help in some storage areas, but they do not make it safe to store wet gear.
How should outdoor gear be organized in a one-bedroom apartment?
Create one main gear zone instead of spreading equipment throughout the home.
Use a closet or freestanding shelf for the main collection, an over-the-door organizer for small accessories, and under-bed space for flat items such as sleeping pads.
Keep frequently used footwear, daypacks, and hiking accessories near the entrance. Store seasonal equipment on higher shelves or in the least accessible bins.
Should clear or opaque bins be used for outdoor gear?
Clear bins make it easy to see the contents. Opaque totes hide visual clutter and protect gear from light.
Clear containers work well inside a dark closet. Opaque heavy-duty totes are often better in brighter rooms, garages, or exposed storage areas.
Both should be labeled.
Can tents and sleeping bags be stored under a bed?
Yes, as long as the area is dry, clean, and protected from pests.
Store the sleeping bag loosely rather than compressed in a shallow container. Keep the tent in a breathable sack and make sure it is completely dry.
Avoid under-bed storage if the area is prone to moisture, leaks, or pet damage.
How often should stored gear be inspected?
Check frequently used equipment whenever it returns from a trip.
Inspect seasonal gear before and after its storage period. Look for moisture, odors, pest activity, leaking batteries, corroded hardware, peeling coatings, and expired first-aid supplies.
Finding a problem early is much easier than discovering it while packing the night before a trip.
Affiliate Disclosure: GearForTheOutdoors.com participates in affiliate programs, including REI, Amazon, REI Outlet, Garage Grown Gear, evo, and other trusted partners. When you purchase through our links, we may earn a small commission at no extra cost to you. That helps support our content and keeps our recommendations useful, practical, and free.
Disclaimer: This post is for informational purposes only. Always verify current product details, fit, availability, safety information, and manufacturer warranties before purchase or use. Outdoor conditions and gear performance can vary depending on setup, weather, terrain, and experience level.