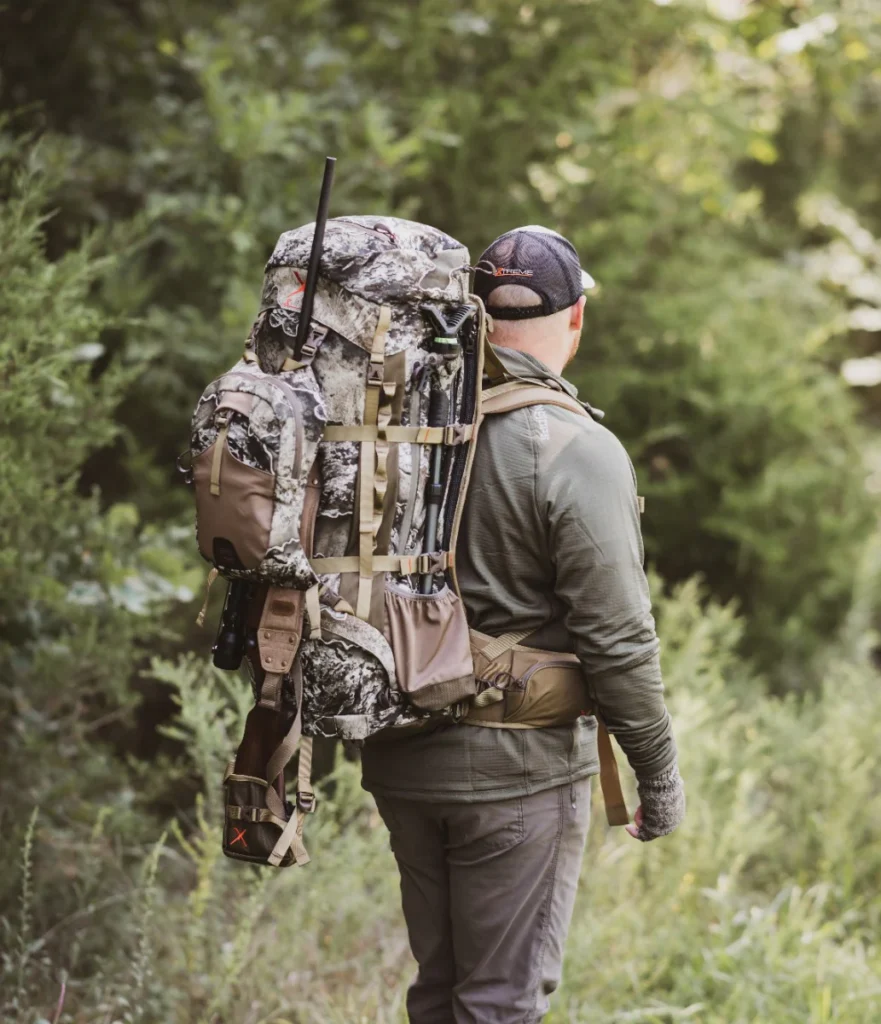
It’s easy to head out for a short hike feeling like everything is under control. The weather looks steady. The route seems simple. The pack is light. 😊
But the outdoors can change fast. A missed turn, a rolled ankle, fading daylight, or a cold rain squall can turn a quick afternoon outing into an unplanned night outside.
When that happens, the gear that matters most usually isn’t the most expensive or the most impressive. It’s the piece that helps preserve warmth, block wind, and buy time until conditions improve or help arrives.
That’s exactly where an emergency mylar shelter earns its place in a pack. Small, light, and easy to overlook, it’s one of those items that feels optional right up until it doesn’t.
This guide takes a closer look at what an emergency mylar shelter actually does, where it fits in a real outdoor kit, and how to use it well when conditions turn. To make the category practical and concrete, the ANLOKE Emergency Survival Shelter is used as the main example throughout.
Quick Take: The ANLOKE Emergency Mylar Shelter
For readers who want the quick verdict first, this style of emergency shelter makes a lot of sense as a backup item. It is not a camping tent, not a comfort-focused sleep system, and not something to plan a regular overnight around. It is emergency gear—plain and simple. 👍
The appeal is straightforward: very low weight, tiny packed size, real weather protection, and meaningful heat retention in a survival situation.
| Feature | Specification | Why It Matters |
|---|---|---|
| Type | Emergency Tube Tent | Simple, A-frame design offers overhead protection from rain and wind. |
| Material | PE Aluminum Film (Mylar) | Reflects up to 90% of your body heat back to you, preventing hypothermia. |
| Capacity | 1-2 Persons (Nominal) | A tight fit for two, but spacious for one person and their gear. |
| Weight | ~8.7 ounces | Incredibly lightweight; easy to stash in a daypack, glove box, or emergency bin. |
| Packed Size | 5.5″ x 3.5″ | Roughly the size of a coffee mug, so it takes up very little room. |
| Key Features | Waterproof, Windproof, Tear-Resistant | Creates a critical barrier against the rain, wind, and exposure that accelerate heat loss. |
| Includes | Paracord, Stakes, Whistle, Stuff Sack | A self-contained kit that is ready to deploy without extra purchases. |
| Price Tier | $ | Affordable enough to add real safety margin without overthinking the cost. |
What Exactly Is an Emergency Mylar Shelter?
An emergency mylar shelter is best understood as emergency protection, not camping shelter. That distinction matters. 😊
It does not replace a backpacking tent, a four-season shelter, or even a simple tarp setup intended for planned use. It usually has no floor, limited durability compared with purpose-built camping gear, and very little comfort. Its job is much narrower and much more important: help keep a person alive during an unexpected night outside.
Most shelters in this category use a reflective film commonly described as Mylar. In the case of the ANLOKE shelter, the material is PE film with an aluminum coating. That shiny surface is what gives this shelter its real value in cold, exposed conditions.
The first key function is heat reflection. Instead of allowing body heat to radiate away into cold air, the reflective material sends a large portion of that warmth back toward the body. In a survival situation, that can make a serious difference.
The second key function is weather protection. Wind and moisture strip warmth fast, especially once a hiker is tired, under-fueled, or damp from rain or sweat. A waterproof, wind-blocking layer helps slow that heat loss and creates a more controlled micro-environment inside the shelter. 🌧️
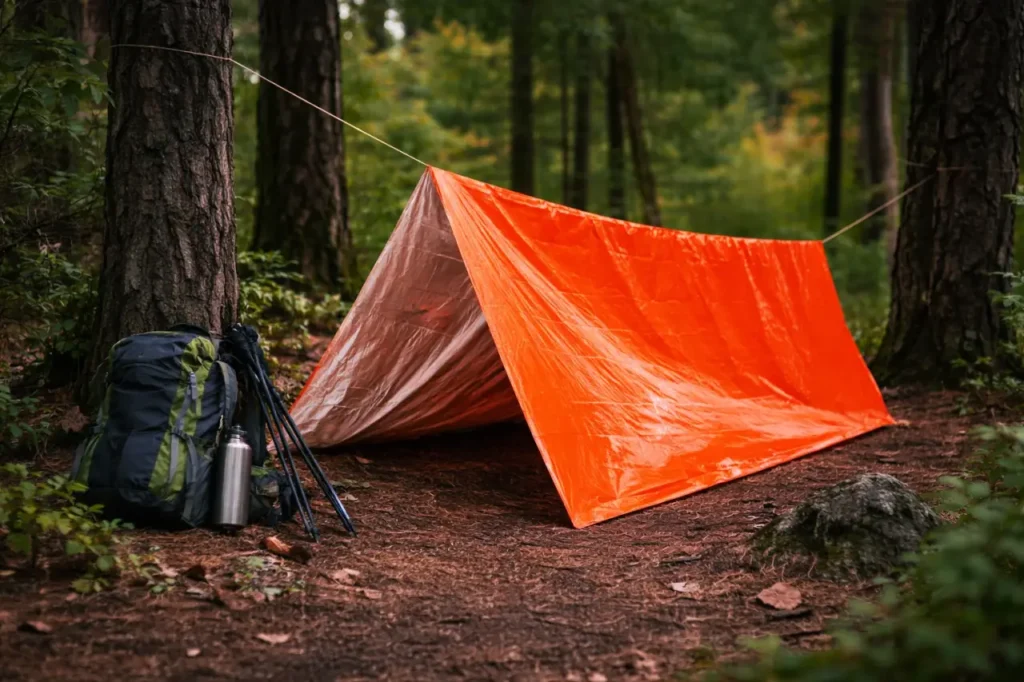
The most common design is the tube-tent format. That means a long sealed tube of reflective material that gets suspended over a ridgeline to form a quick A-frame shelter. It’s simple, compact, and easy to understand under stress—which is exactly the point.
The Unspoken Rule: Why You Need One in Your Pack
Emergency shelter is one of those items that tends to feel unnecessary until the day it becomes urgent. That’s why it remains part of the Ten Essentials conversation for hikers and backcountry travelers.
An emergency mylar shelter is one of the easiest ways to cover that safety gap without adding much bulk or complexity.
Here’s why it deserves a permanent place in a pack:
- It adds very little weight. At under 9 ounces, a shelter like the ANLOKE is easy to carry full-time. It does not ask much from a daypack, which makes the “leave it at home” argument pretty weak.
- Small problems can become big ones outdoors. A delayed turnaround, dead phone battery, slippery descent, weather shift, or navigation mistake can stack up quickly. The need for emergency shelter often starts with a completely ordinary day.
- Exposure is often the real threat. Rain, wind, wet clothing, and dropping temperatures create far more trouble than many hikers expect. Hypothermia is not reserved for dramatic winter epics. It can develop in cool, wet, windy shoulder-season conditions too. ❄️
- Visibility matters during rescue. Bright orange emergency gear is easier to spot than dark tents, jackets, or packs. That can help search teams identify a location faster.
For hikers, hunters, trail runners, car campers, and even road-trip travelers building out a vehicle emergency kit, this is one of the higher-value “just in case” items available for the size and cost.
A Deep Dive on the ANLOKE Emergency Shelter
Using the ANLOKE Emergency Survival Shelter as the working example, it becomes easier to see what makes this category useful—and where its limits start to show.
Core Material: The Science of Warmth
The shelter uses tear-resistant PE aluminum film rather than the flimsiest version of reflective blanket material. That matters more than it might seem at first glance.
Cheaper emergency products can feel so thin that they seem disposable before they’re even opened. A slightly tougher film won’t turn this into expedition gear, but it does improve the odds that the shelter survives setup, tension, shifting wind, and minor abrasion from normal emergency use. 😊
The reflective quality remains the headline feature. The advertised ability to reflect up to 90% of body heat is what makes a shelter like this relevant in the first place. Warmth in an emergency often comes down to reducing heat loss rather than “creating” heat, and reflective shelter materials are built around that principle.
It also helps that the material blocks wind completely. Wind chill is one of the fastest ways to turn a manageable problem into a dangerous one, especially when a person is already sweaty, wet, or inactive.
Design: The Simplicity of the Tube Tent
The tube-tent layout is a big part of why these shelters remain popular. There are no poles, no sleeves, no complex geometry, and no learning curve that feels overwhelming under pressure.
Setup is straightforward:
- Unroll the shelter
- Thread the included paracord through the tube
- Tie the ridgeline between two anchor points
- Stake out the lower corners to create shape and stability
That basic A-frame gives overhead protection and creates just enough enclosed space to conserve warmth better than an open bivy situation.
There’s also some welcome flexibility here. If trees are available, setup is easy. If not, trekking poles, a vehicle, large rocks, fence posts, or other improvised anchor points may work depending on the setting. In the worst-case version of a worst-case day, the shelter can also be used more like a wraparound emergency cover or improvised bivy. 🏕️
The open-ended design is worth understanding before relying on it. Those open ends help with ventilation, which is good. But they also allow drafts and crosswind, which is less good. Placement becomes important. Pitching the shelter with one end protected by brush, terrain, or a large object makes a noticeable difference.
Size & Capacity: Is It Really for Two People?
This is where a more honest reading helps.
The listed dimensions of roughly 82 inches long by 35 inches wide suggest that two people can fit, and technically they can. But “two-person” should be interpreted as emergency-capable, not comfortable.
For two average adults, space will be tight. Really tight. That may still be useful in a true emergency because shared body heat can help, but it is not a roomy two-person shelter in any practical camping sense.
For one person, though, the size is much more convincing. A solo hiker can usually fit inside with some critical gear, maintain more control over clothing and pack organization, and avoid leaving essentials exposed to rain or snow. 👍
That makes the shelter especially practical for day hiking, solo trail use, emergency vehicle kits, and preparedness bins where the goal is to cover one stranded person well rather than two people generously.
The All-in-One Kit: What’s in the Bag?
One of the stronger selling points of the ANLOKE kit is that it arrives as a complete package rather than just a sheet of reflective material.
Included components are:
- The shelter itself
- 20-foot paracord
- 4 metal stakes
- 120-decibel whistle
- Carabiner
- Nylon stuff sack
That all-in-one approach is useful because emergency gear works best when it is simple and self-contained. Readers building a day-hike kit or roadside backup bag do not need to remember separate cordage, stuff sacks, or signaling tools later. It’s already bundled. 😊
The included whistle is especially worth noting. Emergency shelter and signaling often go hand in hand. A visible orange shelter helps rescuers spot a location, while a whistle gives a low-energy, high-volume way to attract attention without exhausting the user.
How to Set Up and Maximize Your Emergency Shelter
A mylar shelter works best when it is treated as part of a system, not as magic fabric.
The material can reflect heat and block weather, but setup decisions determine how well it performs. That’s why practicing once at home is genuinely useful. A short backyard test makes the real thing far less awkward if it ever has to happen in wind, darkness, cold fingers, or stress.
Here are the main ways to get better performance from an emergency shelter:
- Choose protected ground first. Find a spot with natural shelter from wind. The downwind side of trees, brush, a rock face, or a terrain feature can improve comfort and warmth more than expected.
- Keep the ridgeline tight. A sagging setup flaps, leaks space, and wastes energy. A taut line creates better shape and more reliable coverage.
- Pitch it low in rough conditions. In cold wind or rain, lower is usually better. The less open volume inside, the easier it is to retain warmth.
- Insulate from the ground. This is one of the most important steps. The shelter reflects radiant heat, but it does not stop the ground from pulling heat away through conduction. A foam pad is ideal, but dry leaves, pine needles, spare clothing, or a pack under part of the body can help in a pinch. 🍂
- Allow some ventilation. Condensation builds quickly inside non-breathable material. That moisture can make clothing and insulation damp, which creates new problems. Keeping at least part of one end open can help manage that.
- Use the environment intelligently. Packs, logs, rocks, snow blocks, or brush can help shield an open end from wind and make the interior more livable.
In real use, the best setup is rarely the prettiest setup. It is the one that keeps wind off, conserves warmth, minimizes moisture buildup, and feels stable enough to wait out the situation.
Pros and Cons of an Emergency Mylar Shelter
Like most emergency gear, the strengths are real—but so are the tradeoffs.
Pros:
- Very light and compact: Easy to keep in a daypack, glove box, or emergency tote year-round.
- Affordable: One of the cheaper ways to improve safety margin outdoors.
- Strong heat-retention potential: Reflective material can make a meaningful difference in exposure conditions.
- Waterproof and windproof: Creates a real barrier against the elements that most quickly accelerate heat loss.
- High visibility: Bright color improves visibility for rescue.
- Simple design: Easy to understand and fast to deploy in stressful moments. 👍
Cons:
- Not breathable: Condensation management is always part of the equation.
- Limited long-term durability: Better than the flimsiest emergency blanket, but still not built for repeated hard use.
- Can be noisy: Reflective film tends to crinkle, flap, and make itself known in wind.
- Needs setup support: Trees, poles, or other anchors help it work as intended.
- Not a comfort shelter: It solves an emergency problem, not a camping comfort problem.
That balance is why this category works best as backup gear, not as a budget substitute for a real shelter system.
How Does It Compare to Other Emergency Options?
Emergency mylar shelters sit in an interesting middle ground. They are more protective than a basic emergency blanket, less claustrophobic than some bivy sacks, and much cheaper than a quality ultralight tarp setup.
| Shelter Type | Key Advantage | Key Disadvantage | Best For… |
|---|---|---|---|
| Emergency Mylar Shelter (Tube Tent) | Good overhead protection, self-contained kit. | Open ends, requires setup. | The all-around best choice for a daypack or car kit. |
| Emergency Mylar Blanket | Lightest and cheapest option. | Offers minimal protection, hard to rig as a shelter. | Ultralight minimalists; still far better than having nothing. |
| Emergency Bivy Sack | Maximum heat retention, no setup required. | Highly prone to internal condensation, can feel claustrophobic. | Cold, exposed conditions where getting enclosed quickly matters most. |
| Ultralight Silnylon/Silpoly Tarp | Highly durable, versatile, reusable for years. | Heavier, more expensive, requires more skill. | Backpackers who already know tarp setups and want a reusable shelter tool. |
For many readers, the emergency mylar shelter lands in the sweet spot. It’s small enough to carry all the time, capable enough to matter when conditions deteriorate, and simple enough to be realistic for everyday hikers rather than only gear specialists. 😊
The ANLOKE shelter fits that role well. It offers more than a flat blanket, asks less from the user than a tarp, and avoids the fully cocooned feel some people dislike in a bivy.
Final Verdict: The Best 9 Ounces You Can Carry
An emergency mylar shelter will never be the most exciting thing in a gear closet. It won’t get the same attention as a new pack, a lightweight tent, or a favorite camp stove.
But in a real emergency, it may turn out to be one of the smartest items in the entire kit.
That’s the real appeal here. It is light enough to carry routinely, affordable enough to buy without hesitation, and useful enough to make a real difference when a short outing stops being short. It creates shelter from wind and precipitation, helps preserve body heat, and adds a layer of visible safety that matters in rescue scenarios. 🧡
The ANLOKE Emergency Survival Shelter is a solid example of why this category deserves more respect. It’s compact, simple, reasonably complete, and practical for exactly the kind of situation it is meant to address. The two-person label is optimistic, but as a roomy solo emergency shelter—or a tight last-resort option for two—it does the job it claims to do.
For hikers, trail walkers, casual campers, road-trippers, and anyone building out a smart emergency kit, this is an easy yes. Not because it’s glamorous, but because it solves a problem that becomes very important very fast.
Frequently Asked Questions (FAQ)
1. Is an emergency mylar shelter reusable?
Sometimes, yes—but only with caution. If the shelter comes through use without tears, punctures, or damaged seams, it may be folded back up and kept as backup gear. Still, it should always be inspected carefully afterward. Emergency gear is only helpful if it still works when needed, and reflective shelters can be more fragile after one real deployment. 😊
2. How do you prevent condensation inside a mylar shelter?
Ventilation is the main answer. Because the material does not breathe, moisture from breath and body heat will collect inside. Leaving one or both ends at least partially open helps reduce that buildup. Site choice also matters. A protected area with less direct wind can make it easier to balance warmth and airflow.
3. Can you use a mylar shelter in the snow?
Yes, and it can be very useful in snowy conditions, especially for blocking wind and preserving warmth. But the ground becomes even more important in that setting. Snow pulls heat from the body fast, so insulation underneath is essential. A sleeping pad is best, but natural materials like boughs or a thick layer of dry debris can help if nothing else is available. ❄️
4. What’s the real difference between a mylar shelter and a mylar blanket?
A mylar blanket is basically a flat reflective sheet. It can be wrapped around the body and may offer some limited improvisation, but it does not create much structured protection by itself. A mylar shelter is designed to form an actual weather barrier overhead, which makes it more useful in rain, wind, and extended exposure.
5. Is this a good tent for a beginner backpacker?
No. This is emergency gear, not beginner camping gear. It lacks the durability, breathability, bug protection, floor, and comfort needed for planned overnight trips. Beginner backpackers should start with a proper tent or other intentional shelter system designed for regular use. 👍
Affiliate Disclosure: GearForTheOutdoors.com participates in affiliate programs, including REI, Amazon, REI Outlet, Garage Grown Gear, evo, and other trusted partners. When you purchase through our links, we may earn a small commission at no extra cost to you. That helps support the content and keeps recommendations useful, practical, and free.
Disclaimer: This post is for informational purposes only. Always verify current product details, fit, availability, safety information, and manufacturer warranties before purchase or use. Outdoor conditions and gear performance can vary depending on setup, weather, terrain, and experience level.