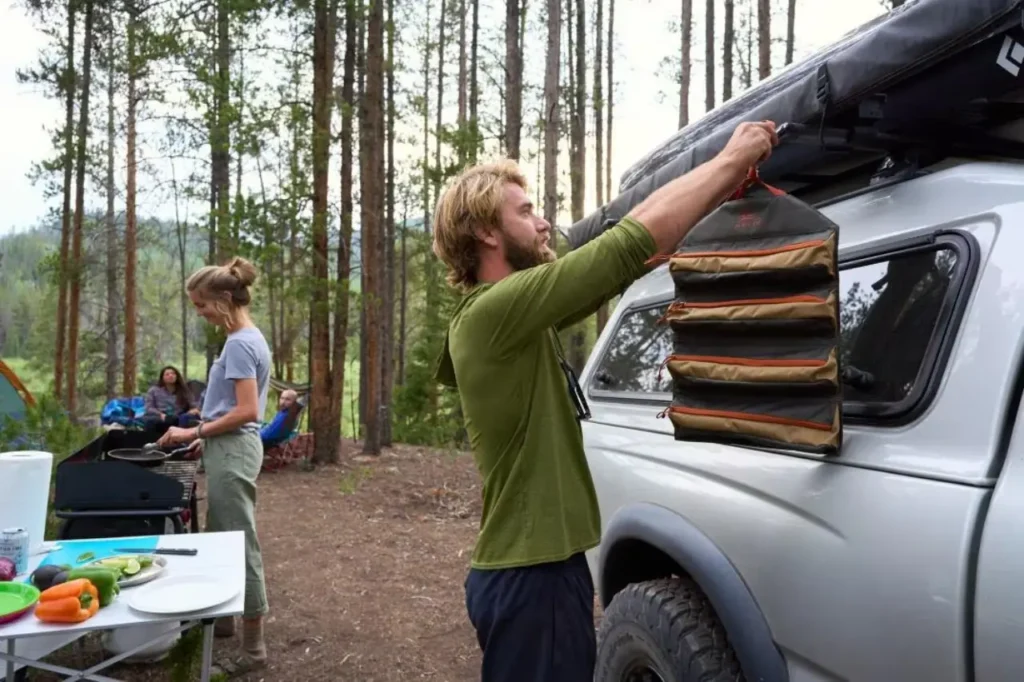
A garage can become crowded surprisingly fast when outdoor gear starts piling up. Tents slide behind storage boxes. Sleeping bags disappear beneath camp chairs. Trekking poles lean against the wall until they fall over. Bike helmets, stove accessories, lanterns, and repair tools somehow end up scattered across three different shelves.
The problem usually becomes obvious right before a trip. Instead of loading the car and heading outside, you spend an hour looking for a headlamp, checking whether the camp stove is still buried in a tote, or trying to remember where the tent footprint ended up after the last rainy weekend.
A practical garage storage setup solves more than visual clutter. It protects expensive gear from moisture, dust, pests, accidental damage, and long-term compression. It also makes packing easier because the essentials are stored in predictable places and organized by activity. 🏕️
The best garage storage systems for outdoor gear do not need to look like a professional workshop. For most campers, hikers, cyclists, and road-trippers, a few well-chosen shelves, bins, wall hooks, and overhead storage zones can make the garage feel calmer and far more useful.
This guide focuses on storage solutions that make sense for real outdoor households. The goal is not to buy the most elaborate system. The goal is to build an organized, flexible setup that makes it easier to grab the right gear and get outside.
Top Garage Storage Picks at a Glance
| Storage System | Best For | Key Advantage | Price Tier |
|---|---|---|---|
| Amazon Basics 5-Shelf Adjustable Steel Wire Rack | Everyday camping and hiking gear bins | Affordable, simple, and easy to adapt | $ |
| Rubbermaid FastTrack Garage Storage System | Backpacks, chairs, tools, and frequently used gear | Modular wall-mounted organization | $$ |
| FLEXIMOUNTS GL1 Garage Lifting Storage Rack | Seasonal equipment and bulky storage bins | Uses ceiling space without requiring a ladder every time | $$$ |
| StoreYourBoard Swivel Mount Bike Storage Rack | Bikes that take up too much floor space | Swivels toward the wall for a cleaner garage layout | $$ |
| Rubbermaid Roughneck Storage Totes | Building grab-and-go camping kits | Durable, stackable storage in multiple sizes | $ |
How to Choose the Right Garage Storage System
The best storage setup depends on the gear you own, the size of the garage, and how often each item leaves the house.
A family that car camps twice a month needs easy access to tents, sleeping pads, cooking gear, and camp chairs. A cyclist may care more about keeping bikes off the floor without making daily rides inconvenient. A kayaker or skier may need a better way to store large seasonal equipment without sacrificing an entire wall.
Before buying anything, take a few minutes to plan the garage around the way the gear is actually used.
1. Measure the Space Before Adding Shelves or Hooks
Start with the basics: floor space, open wall area, ceiling height, and the location of wall studs or ceiling joists.
Measure around the garage door tracks, parked vehicles, water heaters, outlets, windows, and storage cabinets. Overhead storage can be incredibly useful, but only when it does not interfere with the garage door, car roof, or safe walking space.
Wall-mounted systems also need breathing room. A hanging bike, bulky backpack, or folded camp chair can extend farther into the garage than expected. Leave enough clearance to move around comfortably after everything is installed. 🔧
2. Sort Gear by Shape and Frequency of Use
Outdoor gear becomes much easier to organize when it is divided into practical groups.
- Bulky and frequently used: Tents, sleeping pads, coolers, camp stoves, folding tables, and camp chairs. These usually belong on accessible shelves or lower wall hooks.
- Small and easy to lose: Headlamps, batteries, repair kits, water filters, tent stakes, guylines, stove parts, and first-aid supplies. These need labeled bins or smaller containers inside larger totes.
- Long and awkward: Trekking poles, paddles, fishing rods, snowshoes, skis, and folded chairs. These are usually better on wall-mounted hooks or specialty racks.
- Heavy items: Cast-iron cookware, full toolboxes, portable power stations, and larger coolers. Store these low enough that lifting remains safe.
- Seasonal equipment: Rooftop cargo boxes, snow gear, holiday camping items, and rarely used accessories. These can move higher up or into overhead storage.
- Daily-use gear: Bikes, helmets, hydration packs, and dog-walking equipment. These deserve easy-access spots near the garage door.
The simple rule is to keep frequently used gear visible and reachable. Seasonal equipment can live farther back or higher up.
3. Choose Storage Systems That Work Together
A garage usually works better when several storage types support each other.
- Freestanding shelves are ideal for labeled bins, coolers, and gear that needs to stay easy to reach.
- Wall-mounted rail systems handle awkward items such as backpacks, camp chairs, trekking poles, helmets, and tools.
- Ceiling-mounted racks create useful space for seasonal bins and bulky items that do not need to be accessed every weekend.
- Bike racks prevent handlebars, pedals, and wheels from taking over valuable walking space.
- Durable totes turn loose equipment into organized kits that can be loaded into the car quickly.
A single shelf may help, but a shelf combined with labeled bins and a few wall hooks creates a much more useful setup.
4. Think About Moisture, Heat, and Pests
Garages are convenient, but they are not always ideal environments for delicate outdoor gear.
Avoid storing equipment directly on a concrete floor, especially sleeping bags, tents, clothing, and cardboard boxes. Concrete can collect moisture, and floor-level storage is more vulnerable to pests and accidental water exposure.
Do not leave sleeping bags compressed in small stuff sacks for months. Do not put away tents, tarps, or camp blankets while they are damp. Avoid storing food, scented items, or open fuel canisters alongside camping gear.
A garage should be the staging area for the next adventure, not a place where gear slowly deteriorates between trips. 🌲
The Best Garage Storage Systems for Outdoor Gear
These five storage solutions cover the most common problems: loose bins, cluttered walls, unused ceiling space, bikes blocking walkways, and small gear disappearing into random boxes.
Best Everyday Shelving: Amazon Basics 5-Shelf Adjustable Steel Wire Rack
A sturdy shelving unit is the simplest place to start when camping gear has outgrown a closet or corner of the garage.
The Amazon Basics 5-Shelf Adjustable Steel Wire Rack is a practical choice because it offers enough capacity for typical outdoor storage without taking over the entire garage. The five wire shelves can be adjusted in 1-inch increments, making it easier to create taller openings for camping bins, coolers, or bulky sleep systems.
Each shelf supports up to 350 pounds when the weight is evenly distributed, with a total capacity of up to 1,750 pounds. The 36-by-14-inch footprint is narrower than oversized warehouse-style shelving, which makes it easier to fit along a garage wall while preserving space for a parked vehicle. Assembly is tool-free, and leveling feet help stabilize the rack on uneven floors.
| Spec | Detail |
|---|---|
| Material | Alloy steel wire shelving |
| Dimensions | 36″ L x 14″ W x 72″ H |
| Number of Shelves | 5 |
| Weight Capacity | Up to 350 lbs per shelf; 1,750 lbs total |
| Shelf Adjustment | 1-inch increments |
| Assembly | Tool-free |
Why It Works Well for Outdoor Gear
This rack is especially useful for campers who organize by activity. One shelf can hold the camp kitchen tote and stove. Another can store lanterns, extension cords, and portable power accessories. Sleeping pads and lighter equipment can go higher up, while heavier bins remain close to the floor.
Wire shelves also improve visibility and airflow. That matters in a garage, where solid shelving can collect dust and trap moisture around equipment.
For families with a modest amount of outdoor gear, this rack offers a smart balance of capacity, price, and footprint. It is also easy to add a second unit later if the gear collection grows.
Pros
- Affordable starting point for a garage organization system
- Adjustable shelves accommodate different bin sizes
- Narrow footprint fits smaller garages more easily
- Tool-free assembly
- Suitable for most camping, hiking, and road-trip gear
Cons
- The 14-inch depth may feel narrow for oversized totes or very large coolers
- Wire shelves are less convenient for tiny loose items unless bins or shelf liners are used
- Not designed for very large equipment such as kayaks or rooftop cargo boxes
Who It’s Best For
Campers, hikers, and families who need an organized home for everyday outdoor gear without installing a large permanent system.
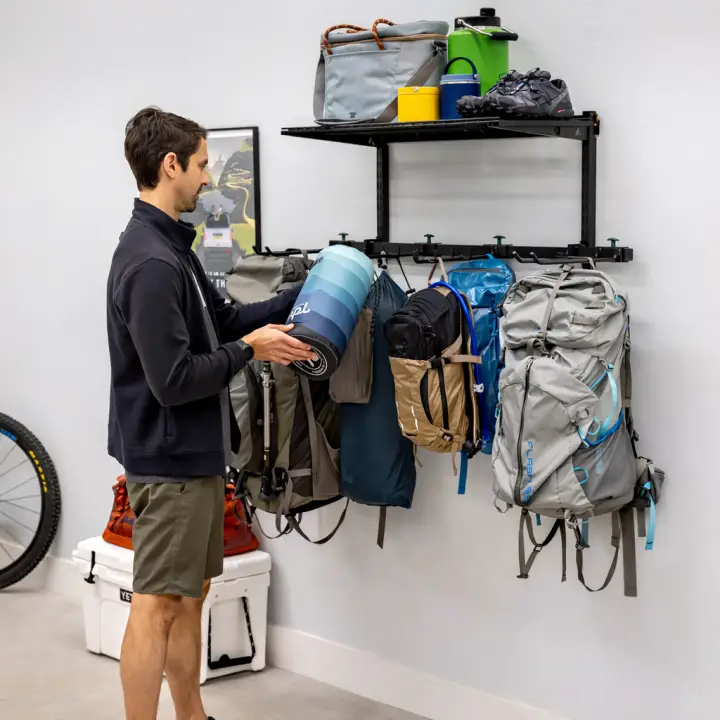
Best Wall-Mounted System: Rubbermaid FastTrack Garage Storage System
Some gear simply does not stack well. Backpacks collapse into awkward piles. Folding camp chairs lean against the wall until they tip over. Trekking poles, extension cords, helmets, and small tools always seem to migrate around the garage.
The Rubbermaid FastTrack Garage Storage System solves that problem by turning open wall space into flexible storage.
The system begins with a steel rail mounted securely to the wall. Hooks, baskets, shelves, and other accessories can then be moved along the rail as storage needs change. Rubbermaid offers starter kits as well as individual components, which makes it possible to begin with a small setup and expand gradually.
The official 5-piece starter kit includes a 32-inch rail, one utility hook, two handle hooks, two scoop hooks, and the required installation hardware. Rubbermaid states that the FastTrack rail system supports up to 1,750 pounds when properly installed.
| Spec | Detail |
|---|---|
| System Type | Wall-mounted rail with movable accessories |
| Starter Kit Rail Length | 32 inches |
| Included Accessories | Utility hook, 2 handle hooks, 2 scoop hooks |
| Weight Capacity | Up to 1,750 lbs when properly installed |
| Best Feature | Expandable, adjustable layout |
Why It Works Well for Outdoor Gear
FastTrack is useful because the layout can evolve with the seasons.
During summer, hooks can hold camp chairs, backpacks, hydration packs, paddles, and bike helmets. In winter, the same wall zone can be reorganized for snowshoes, trekking poles, skis, or shovels.
The system is also useful near the garage door. Instead of digging through bins before an early-morning hike, frequently used items can hang where they are easy to grab. 🎒
A rail system does not replace shelving. It complements shelving by handling equipment that is too awkward to store neatly in a tote.
Pros
- Makes use of wall space without cluttering the garage floor
- Hooks and accessories can be rearranged as needs change
- Starter kits make it easy to begin with a smaller setup
- Useful for backpacks, helmets, tools, poles, and folded chairs
- Can expand with shelves and additional accessories
Cons
- Installation requires drilling into a suitable wall surface
- Accessories can add to the total cost over time
- Careful planning is needed before hanging heavy items
Who It’s Best For
Anyone with limited floor space or a collection of awkward gear that never seems to stay organized on traditional shelving.
Best Ceiling Storage: FLEXIMOUNTS GL1 Garage Lifting Storage Rack
The ceiling is one of the most overlooked parts of a garage.
Seasonal storage bins, bulky camp accessories, extra sleeping gear, and equipment used only a few times each year can take up valuable shelf space. Moving those items overhead can make the rest of the garage much easier to use.
The FLEXIMOUNTS GL1 Garage Lifting Storage Rack provides a 4-by-4-foot platform that raises and lowers with a hand crank or power drill. This makes overhead storage more practical because you do not need to climb a ladder every time a bin needs to come down.
The rack is built from heavy-duty steel and safely supports up to 350 pounds. The manufacturer states that it is compatible with 12-inch, 16-inch, and 24-inch ceiling joist spacing. When raised, the platform sits approximately 10 inches below the ceiling.
| Spec | Detail |
|---|---|
| Material | Heavy-duty steel |
| Platform Size | 4 ft x 4 ft |
| Safe Load Capacity | Up to 350 lbs |
| Lifting Method | Hand crank or power drill |
| Joist Compatibility | 12″, 16″, or 24″ spacing |
| Best Feature | Lowerable platform reduces ladder use |
Why It Works Well for Outdoor Gear
This rack is best for equipment that needs to stay accessible but does not need to occupy prime garage real estate.
A winter camping tote, extra camp blankets, rarely used paddling accessories, inflatable gear, and seasonal road-trip equipment can live overhead while everyday camping bins stay within reach.
The lowering mechanism is the key advantage. Fixed overhead racks are useful, but loading and unloading them can feel awkward when heavy bins need to be moved from a ladder. A rack that comes down toward you is easier to work with and more practical for long-term use.
Pros
- Reclaims unused ceiling space
- Platform lowers with a hand crank or drill
- Useful for seasonal bins and bulky equipment
- Reduces dependence on a ladder during loading and unloading
- Compatible with several common joist spacings
Cons
- Installation is more involved than adding a freestanding shelf
- Ceiling height and garage door clearance must be measured carefully
- Not the right place for gear needed every weekend
- Heavy equipment still needs to be loaded thoughtfully and within the stated capacity
Who It’s Best For
Campers, road-trippers, and outdoor families with seasonal bins or bulky gear taking up valuable floor and shelf space.
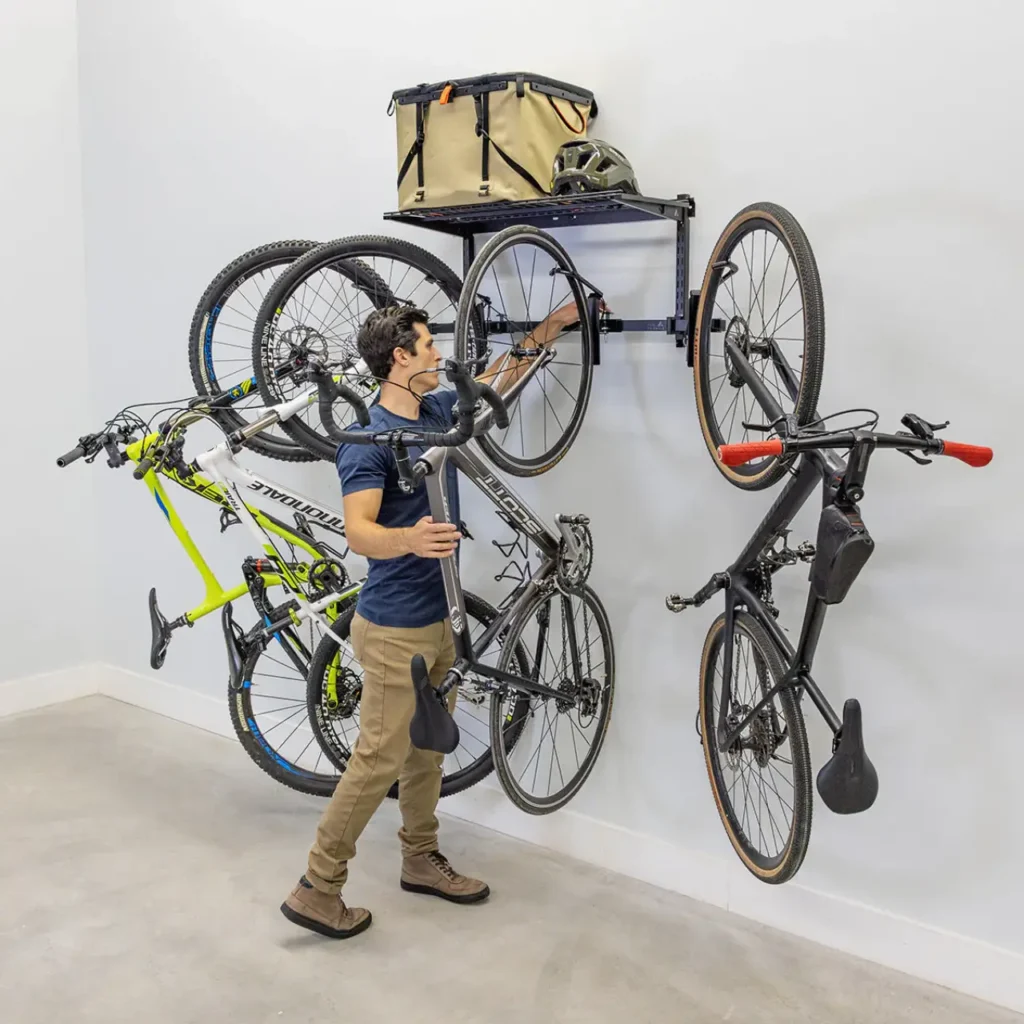
Best Bike Storage: StoreYourBoard Swivel Mount Bike Storage Rack
Bikes create a specific garage storage problem. Leaning them against a wall takes up more room than expected, pedals catch on nearby gear, handlebars overlap, and one bike often needs to be moved before another can come out.
The StoreYourBoard Swivel Mount Bike Storage Rack clears floor space by holding bikes vertically on the wall. Each rack swivels to the side, allowing the bike to sit closer to the wall when it is not being used.
The 4-bike version uses rubber-coated hooks to protect wheel rims and offers three locking positions: straight out from the wall or angled 62 degrees to the left or right. Each solid steel rack supports up to 50 pounds and fits tires up to 2.6 inches wide and wheels up to 29 inches in diameter.
| Spec | Detail |
|---|---|
| System Type | Wall-mounted swiveling bike hooks |
| Capacity | Up to 4 bikes |
| Weight Capacity | Up to 50 lbs per rack |
| Tire Compatibility | Up to 2.6″ wide |
| Wheel Compatibility | Up to 29″ diameter |
| Swivel Positions | Straight, 62° left, or 62° right |
Why It Works Well for Outdoor Gear
A dedicated bike rack creates a cleaner layout immediately. Bikes stay visible, easy to access, and less likely to damage other equipment.
The swivel design is particularly helpful in narrow garages. When the bikes are not in use, they can angle toward the wall and free up more walking space. 🚲
This system works best for standard road, gravel, kids’, and many mountain bikes. Riders with heavier e-bikes, fat-tire bikes, or unusually wide tires should carefully verify compatibility before buying.
Pros
- Clears bikes from the garage floor
- Swivel design reduces the amount of space bikes occupy
- Rubber-coated hooks help protect wheel rims
- Multiple locking positions improve flexibility
- Useful for households with several bikes
Cons
- Each bike needs to be lifted into the vertical position
- Standard hooks may not fit every fat-tire bike or heavier e-bike
- Stud location affects the final layout
- Bikes with unusual frames, fenders, or accessories may need extra clearance
Who It’s Best For
Cyclists and families who want bikes to stay accessible without sacrificing an entire garage wall or walkway.
Best Storage Bins: Rubbermaid Roughneck Storage Totes
Shelves and wall racks solve the big-picture problem. Good storage bins solve the daily problem of small gear ending up everywhere.
The Rubbermaid Roughneck Storage Totes are well suited to garage use because they are stackable, washable, and available in multiple sizes. The recessed lids help the bins stack more securely, while the durable plastic construction is designed for repeated use in spaces such as garages, basements, and attics.
Rubbermaid offers Roughneck totes in sizes ranging from compact bins to larger 50-gallon options. For outdoor gear, medium-size totes are usually easier to manage than one enormous container. A 14-, 18-, 25-, or 31-gallon tote is often large enough to hold a complete gear category without becoming unpleasantly heavy to lift.
| Spec | Detail |
|---|---|
| Material | Durable plastic |
| Available Sizes | Multiple sizes, from small bins to large totes |
| Design | Stackable with recessed lids |
| Best Feature | Easy to build modular activity-based kits |
| Ideal Use | Camp kitchen gear, sleep systems, tools, lighting, and accessories |
Why It Works Well for Outdoor Gear
A tote system makes packing noticeably easier.
Instead of gathering loose items from different corners of the garage, create dedicated bins such as:
- Camp Kitchen
- Lighting and Power
- Tent Accessories
- Sleep System
- Hiking Day Gear
- Bike Repair
- Cold-Weather Camping
- Dog Camping Gear
- Road-Trip Essentials
The tote does not need to carry every item in that category. Large equipment such as a tent or folding chairs may still live on a shelf or wall hook. The goal is to keep smaller pieces together so nothing important gets left behind.
Opaque bins should be labeled clearly. A large label on the front and one on the lid saves time when bins are stacked. Adding a short inventory card inside the tote can also make restocking easier after a trip.
Pros
- Durable enough for regular garage use
- Easy to stack on shelving
- Multiple sizes make it easier to organize by category
- Washable and reusable
- Helps transform loose gear into grab-and-go kits
Cons
- Opaque plastic makes labeling essential
- Large totes can become too heavy when overloaded
- Not airtight enough for food storage or items that attract pests
- Soft goods still need to be completely dry before storage
Who It’s Best For
Almost every camper, hiker, cyclist, or outdoor family. A reliable tote system is one of the simplest ways to make packing faster and protect small gear between trips.
Putting It All Together: A Practical Gear Organization Plan
Buying shelves and bins helps, but the real improvement comes from organizing the garage around the way the gear gets used.
A complicated system can become frustrating after a few months. A simple, clearly labeled layout is more likely to stay organized through busy weekends, rushed departures, and tired unpacking sessions after a long drive home.
Step 1: Empty the Main Storage Area
Pull gear out of the shelves, corners, and random boxes where it has accumulated.
This is the best time to inspect equipment. Look for damp tents, cracked bins, expired first-aid items, damaged guylines, leaking fuel bottles, loose bike tools, and missing tent stakes.
Anything that needs cleaning or repair should move into a separate pile before it goes back into storage.
Step 2: Create Activity Zones
Divide the garage into zones based on the way the gear leaves the house.
A useful layout might include:
- Camping Zone: Tent, sleeping pads, camp kitchen bins, lanterns, chairs, and coolers
- Hiking Zone: Daypacks, trekking poles, hydration gear, headlamps, and trail accessories
- Bike Zone: Bikes, helmets, pumps, repair tools, and spare tubes
- Seasonal Zone: Cold-weather gear, snow equipment, paddling accessories, and rooftop cargo items
- Trip Prep Zone: Empty shelf or bench space for loading and checking equipment before departure
This makes the garage easier to use because gear for the same activity stays together.
Step 3: Store Heavy Gear Low
Portable power stations, cast-iron cookware, large toolboxes, and heavy bins belong on lower shelves.
Lighter gear such as sleep systems, empty packs, camp blankets, and inflatable equipment can go higher.
This is not only more convenient. It reduces the chance of an awkward lift or falling bin.
Step 4: Use Wall Space for Awkward Equipment
Hang the items that refuse to stack neatly: camp chairs, backpacks, trekking poles, helmets, bike pumps, extension cords, and small tools.
A wall rail system keeps these items visible without allowing them to spill across the floor. 🥾
Step 5: Move Seasonal Gear Overhead
Store rarely used or seasonal items on an overhead rack only after measuring clearance carefully.
Keep frequently used tents, sleep systems, and camp kitchen gear lower down. The ceiling rack should hold items that can wait until the right season or trip.
Step 6: Label Every Tote
Labels should be easy to read without moving the bin.
Use broad categories instead of vague labels. “Camping Stuff” is not very helpful. “Camp Kitchen,” “Tent Accessories,” or “Cold-Weather Sleep Gear” makes it much easier to grab the correct tote.
For bins with several small items, tape a simple checklist beneath the lid.
Step 7: Make Unpacking Part of the System
A storage setup only works when gear returns to the right place.
After each trip:
- Dry tents, tarps, and blankets completely.
- Wash cookware and remove every food item.
- Recharge power stations, lanterns, and headlamps.
- Refill first-aid supplies and fuel only according to manufacturer instructions.
- Return each item to its labeled zone.
- Leave a note on any bin that needs restocking before the next trip.
Ten minutes of organized unpacking can prevent an hour of frustration before the next departure.
Final Verdict
The best garage storage system for outdoor gear is usually a combination of simple solutions rather than one expensive installation.
For most campers and hikers, the Amazon Basics 5-Shelf Adjustable Steel Wire Rack is the easiest place to begin. Add a set of Rubbermaid Roughneck Storage Totes, label each bin clearly, and the garage immediately becomes more useful.
For gear that never stacks neatly, the Rubbermaid FastTrack Garage Storage System creates a flexible wall zone for backpacks, chairs, poles, helmets, and tools. Cyclists can reclaim even more floor space with the StoreYourBoard Swivel Mount Bike Storage Rack.
When seasonal bins are still taking over the garage, the FLEXIMOUNTS GL1 Garage Lifting Storage Rack makes better use of overhead space without turning every storage task into a ladder-balancing exercise.
A well-organized garage does not need to feel perfect. It simply needs to help you find the right gear, protect the equipment you have already invested in, and make the next trip easier from the moment packing begins. 🌄
Frequently Asked Questions
What is the best way to store sleeping bags in a garage?
Sleeping bags should be stored loosely so the insulation can maintain its loft. Do not leave them compressed inside small stuff sacks for long periods.
Use the larger breathable storage sack that often comes with the sleeping bag, or place the bag loosely inside a cotton or mesh sack. Keep it on a clean shelf rather than directly on the garage floor.
In very humid garages, indoor storage may be safer for down sleeping bags and other moisture-sensitive sleep gear.
How should a tent be stored between camping trips?
A tent should be completely clean and dry before it goes into storage. Even a small amount of trapped moisture can lead to mildew, odor, and fabric damage.
For long-term storage, keep the tent loosely packed in a breathable bag rather than tightly compressed. Store it on a shelf away from direct sunlight, sharp tools, chemicals, and concrete floors.
Tent poles and stakes can stay together in their original bags, but make sure damp stakes are wiped clean before storage.
Are clear bins or opaque totes better for outdoor gear?
Both can work well.
Clear bins make it easier to see the contents, which is helpful for small accessories and gear used frequently. Opaque totes usually look tidier on shelves and can provide better protection from light exposure.
For most garages, durable opaque totes with large labels are a practical choice. Use smaller clear organizers inside the tote for tiny items such as batteries, stove accessories, tent repair pieces, and headlamp cables.
Should camping food be stored in the garage?
Avoid storing food, snacks, scented toiletries, or backpacking meals in the garage whenever possible.
Even sealed food can attract rodents and insects. Food can also deteriorate faster when exposed to changing garage temperatures.
Keep camping cookware in the garage only after it has been thoroughly cleaned and dried. Store food separately indoors until the trip.
How should climbing ropes be stored?
Store climbing ropes clean, dry, and protected from chemicals, sharp tools, direct sunlight, and excessive heat.
A rope bag placed on a shelf or inside a clean storage bin is usually more appropriate than hanging the rope from a narrow hook for long periods. Follow the rope manufacturer’s storage and inspection guidance before use.
Is overhead garage storage safe for outdoor gear?
Overhead storage can be useful when the rack is installed correctly into suitable structural supports and the stated weight limit is respected.
Measure carefully before installation. Check garage door clearance, vehicle height, walking space, and access to the stored items.
Avoid placing fragile gear, fuel containers, or items needed frequently on an overhead rack. Use overhead space for well-contained seasonal bins and bulky equipment that can be stored safely.
How should fuel canisters be stored?
Follow the manufacturer’s instructions for the specific fuel type.
In general, fuel canisters should be stored upright in a cool, dry, well-ventilated area away from direct sunlight, ignition sources, heat, sparks, and living spaces. Do not place them in a hot vehicle, sealed tote, or poorly ventilated overhead storage area.
Inspect canisters regularly and dispose of damaged or leaking containers according to local guidelines.
What gear should not be stored in a garage?
Avoid long-term garage storage for equipment that is especially sensitive to humidity, heat, freezing temperatures, pests, or chemical exposure.
Depending on the garage environment, that may include down sleeping bags, electronics, lithium batteries, delicate clothing, climbing ropes, food, medications, and water filters that could freeze.
When in doubt, follow the product manufacturer’s storage instructions.
Affiliate Disclosure: GearForTheOutdoors.com participates in affiliate programs, including REI, Amazon, REI Outlet, Garage Grown Gear, evo, and other trusted partners. When you purchase through our links, we may earn a small commission at no extra cost to you. That helps support our content and keeps our recommendations useful, practical, and free.
Disclaimer: This post is for informational purposes only. Always verify current product details, fit, availability, safety information, and manufacturer warranties before purchase or use. Outdoor conditions and gear performance can vary depending on setup, weather, terrain, and experience level.